
Have you ever seen those ads that populate when you type something into a search bar? For instance, when I type the word “gifts” into the Google search bar, here’s what happens: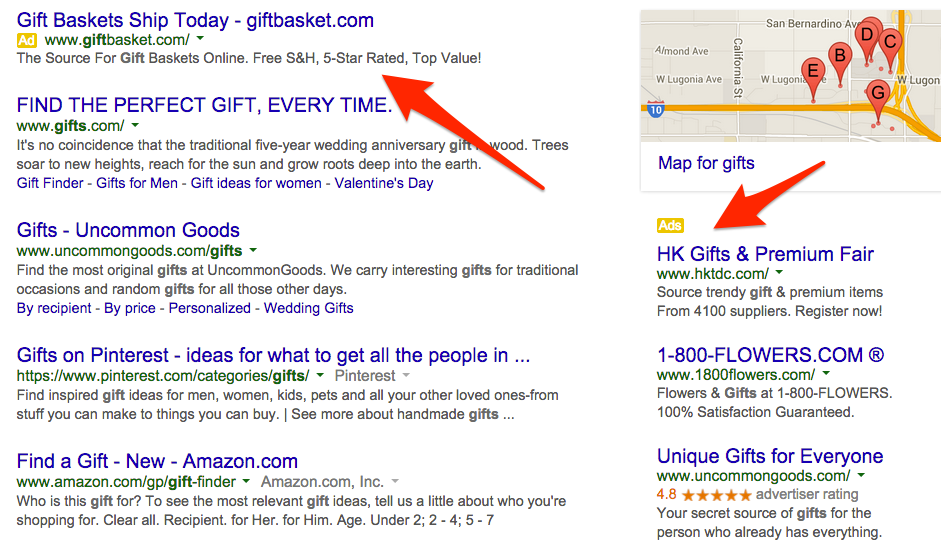
The arrows are pointing to advertising that has been paid for on Google AdWords.
Many companies invest a vast portion of their marketing budget into Adwords because it enables them to rank for various search keywords that they are targeting.
Below, you will learn how to setup Google AdWords tracking for Shopify, which tracks the amount of Google AdWords clicks you are getting in relation to the volume of sales you are generating.
This will make sure you get the most use out of your AdWords dollars and help with further PPC strategy.
Step #1: Get your code snippet
The AdWords tracking code snippet is given to you when you sign up to track conversions.
a) To do this, login to your Google Adwords account, and from the top menu select
Tools → conversions:
b) Then, in the conversion actions section click on the “ + CONVERSION” button.
c) You will then be taken to this page, and will click on the “Select” button under the “Website” bucket.
d) Next, enter the name of what conversion you want to track and demarcate its value to your business. Then, click “Done”.
e) You are now able to set the parameters for your conversion tracking. In the first window, click the second button in the “Value” section, and enter the conversion value. When you are finished with this click “Done.”
f) This next section gives you two options for the way you count your conversions. Choose between “Every” or “One,” and then click “Done.”
g) You will then choose the conversion window you want to track. Choose how long you desire to track conversions after an ad click or other interaction. Also choose duration for “View through conversion window.”
Make sure you tick the checkbox to “Include in Conversions.” Lastly select your desired “Attribution model”.
h)
Next, on the Settings page, scroll down the page, and you will see your code inside of a text box:
This code snippet will track conversions when placed on the “
Thank You
” page of your Shopify website. Copy your own tracking code (not the one above) to your clipboard.
Note: only sales that were generated by the clicking of your ad will be recorded.
Unless your “Thank You” page is visited after a transaction, the conversion tracking code won’t run. There will be no tracking if your customer is not returning to Shopify after a transaction has been completed using an offsite payment gateway. This is hit and miss, and sadly, and there’s nothing we can do to help with that, other than suggest using a fully-integrated-with-Shopify payment gateway in which case the “Thank You” page is always visited.
Step #2: Inserting the tracking code
a) Go to the admin section of your Shopify store.
b) Click on “Settings”
c) Click “Checkout”
d) Scroll down to the “Order Processing” section
e) In the “Order Processing” section, locate the “Additional Content & Scripts” editable text box:
f) There, paste the code snippet you just received from Google
g) After pasting the code, click “Save”
Step #3: Manipulating the snippet to provide real data:
Before we get started, let’s understand the meaning of each Google conversion.
google_conversion_id: This is an unique value that allows Google to identify the advertiser receiving the conversion.
google_conversion_value: This is a numeric value defined by the advertiser equaling the value of the conversion.
google_conversion_label: This is the type of conversion that occurred (purchase, signup, page view, or lead).
google_conversion_language: This is the language of the conversion tracking Google Site Stats text that appears on your website.
Change the following code:
var google_conversion_value = 1;
To this code:
if ({{ subtotal_price }}) { var google_conversion_value = {{ subtotal_price | money_without_currency }}; }
If you want to include the taxes and shipping in the conversion amount, then use the code which is mentioned below, instead of the above code:
if ({{ total_price }}) { var google_conversion_value = {{ total_price | money_without_currency }}; }
The <noscript> tag also must be taken care of, since the <noscript> tag defines an alternate content for users that have disabled scripts in their browser, or have a browser that doesn’t support script.
The content inside the <noscript> element will be displayed if scripts are not supported or are disabled in the user’s browser.
Then you need to replace the following in the pixel tracking URL:
value=1
With:
value={{ subtotal_price | money_without_currency }}
Or this:
value={{ total_price | money_without_currency }}
Comments