When you create an automated collection in Shopify, you’re essentially setting conditions that match products for a specific collection.
As of 2019, collections can have up to 60 conditions. Your store can have up to 5,000 automated collections.
Note: You cannot change manual collections to automated collections. However, you can add a tag to all of the products in your manual collection, and then create a new automated collection using that tag as a condition.
Follow these steps to create an automated collection:
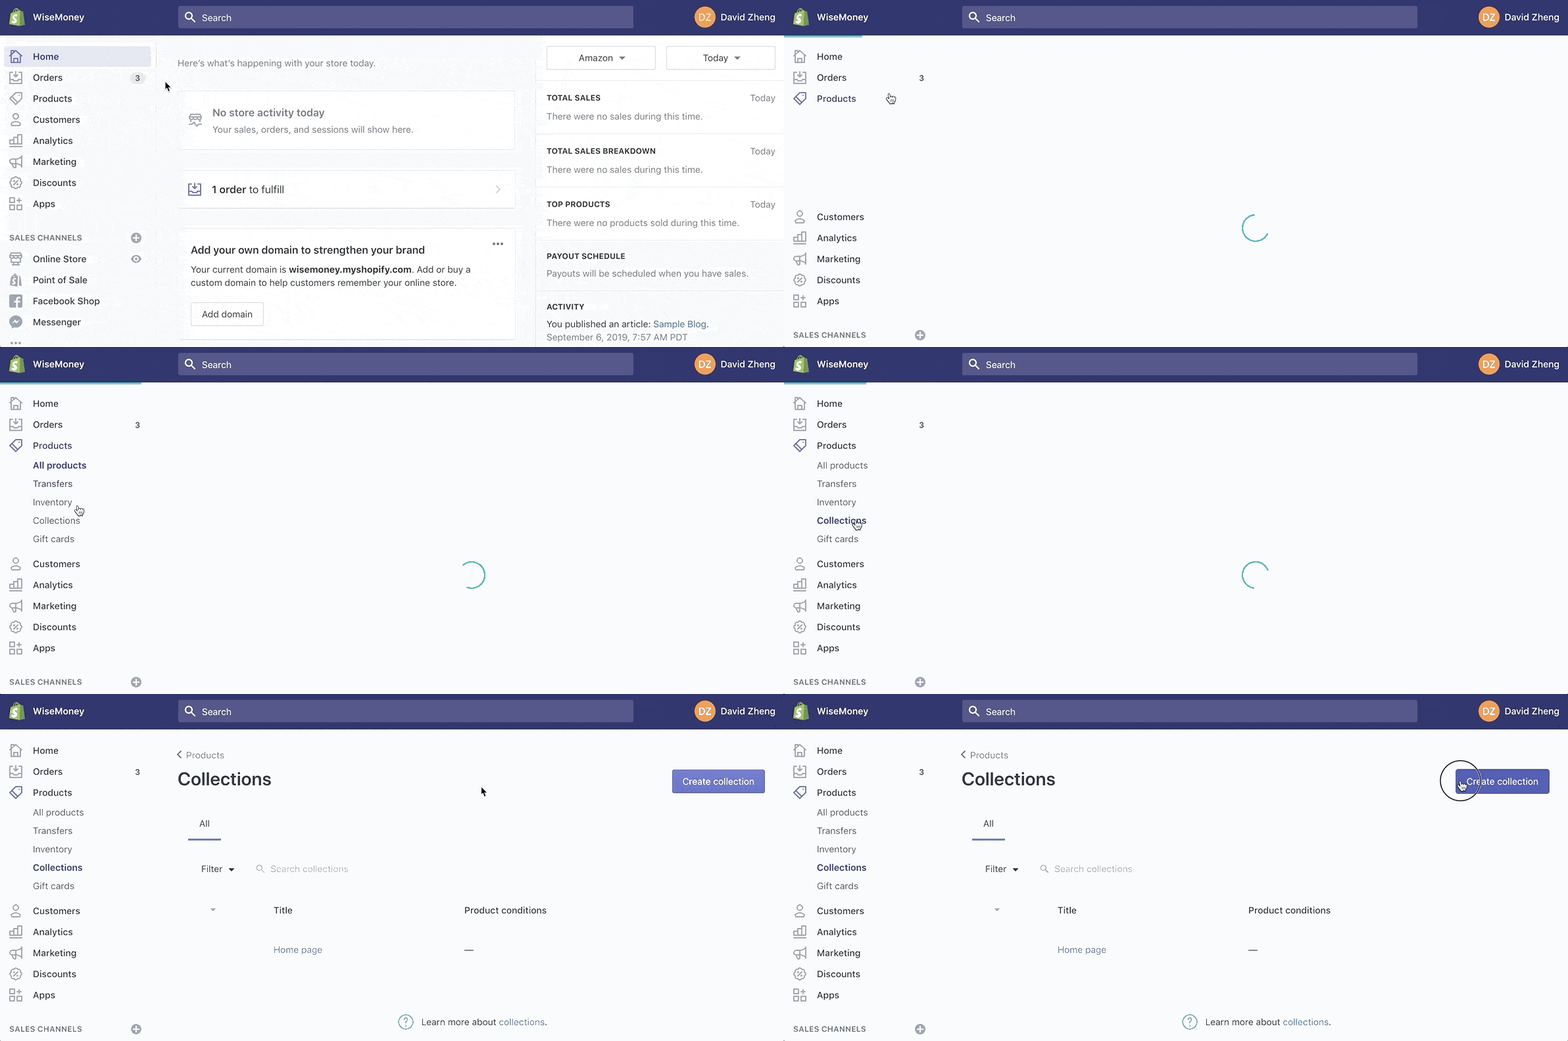
Step #1: Click on “Products” from your Shopify admin dashboard.
Step #2: Select “Collections” from the expanded menu.
Step #3: Click “Create Collection.”
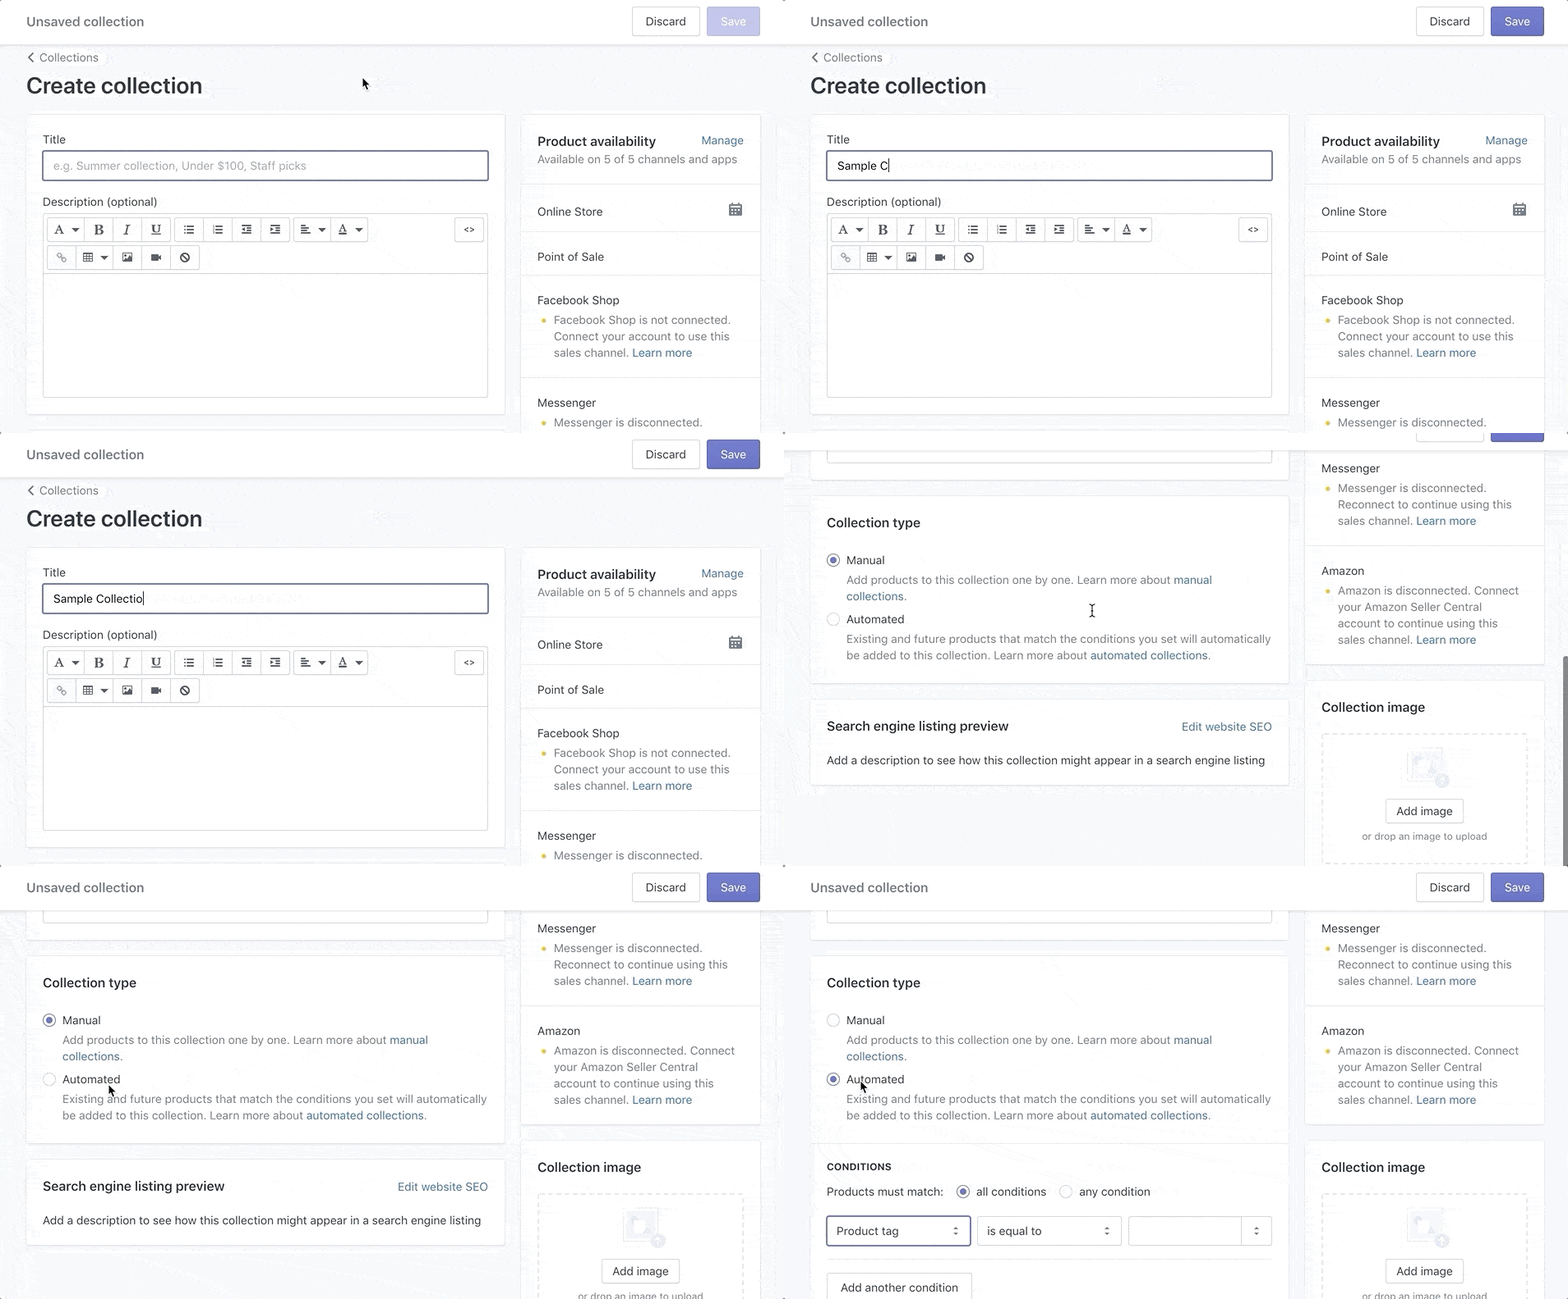
Step #4: Add a title to the collection.
Step #5: Selected “Automated” from the “Collection Type” section.
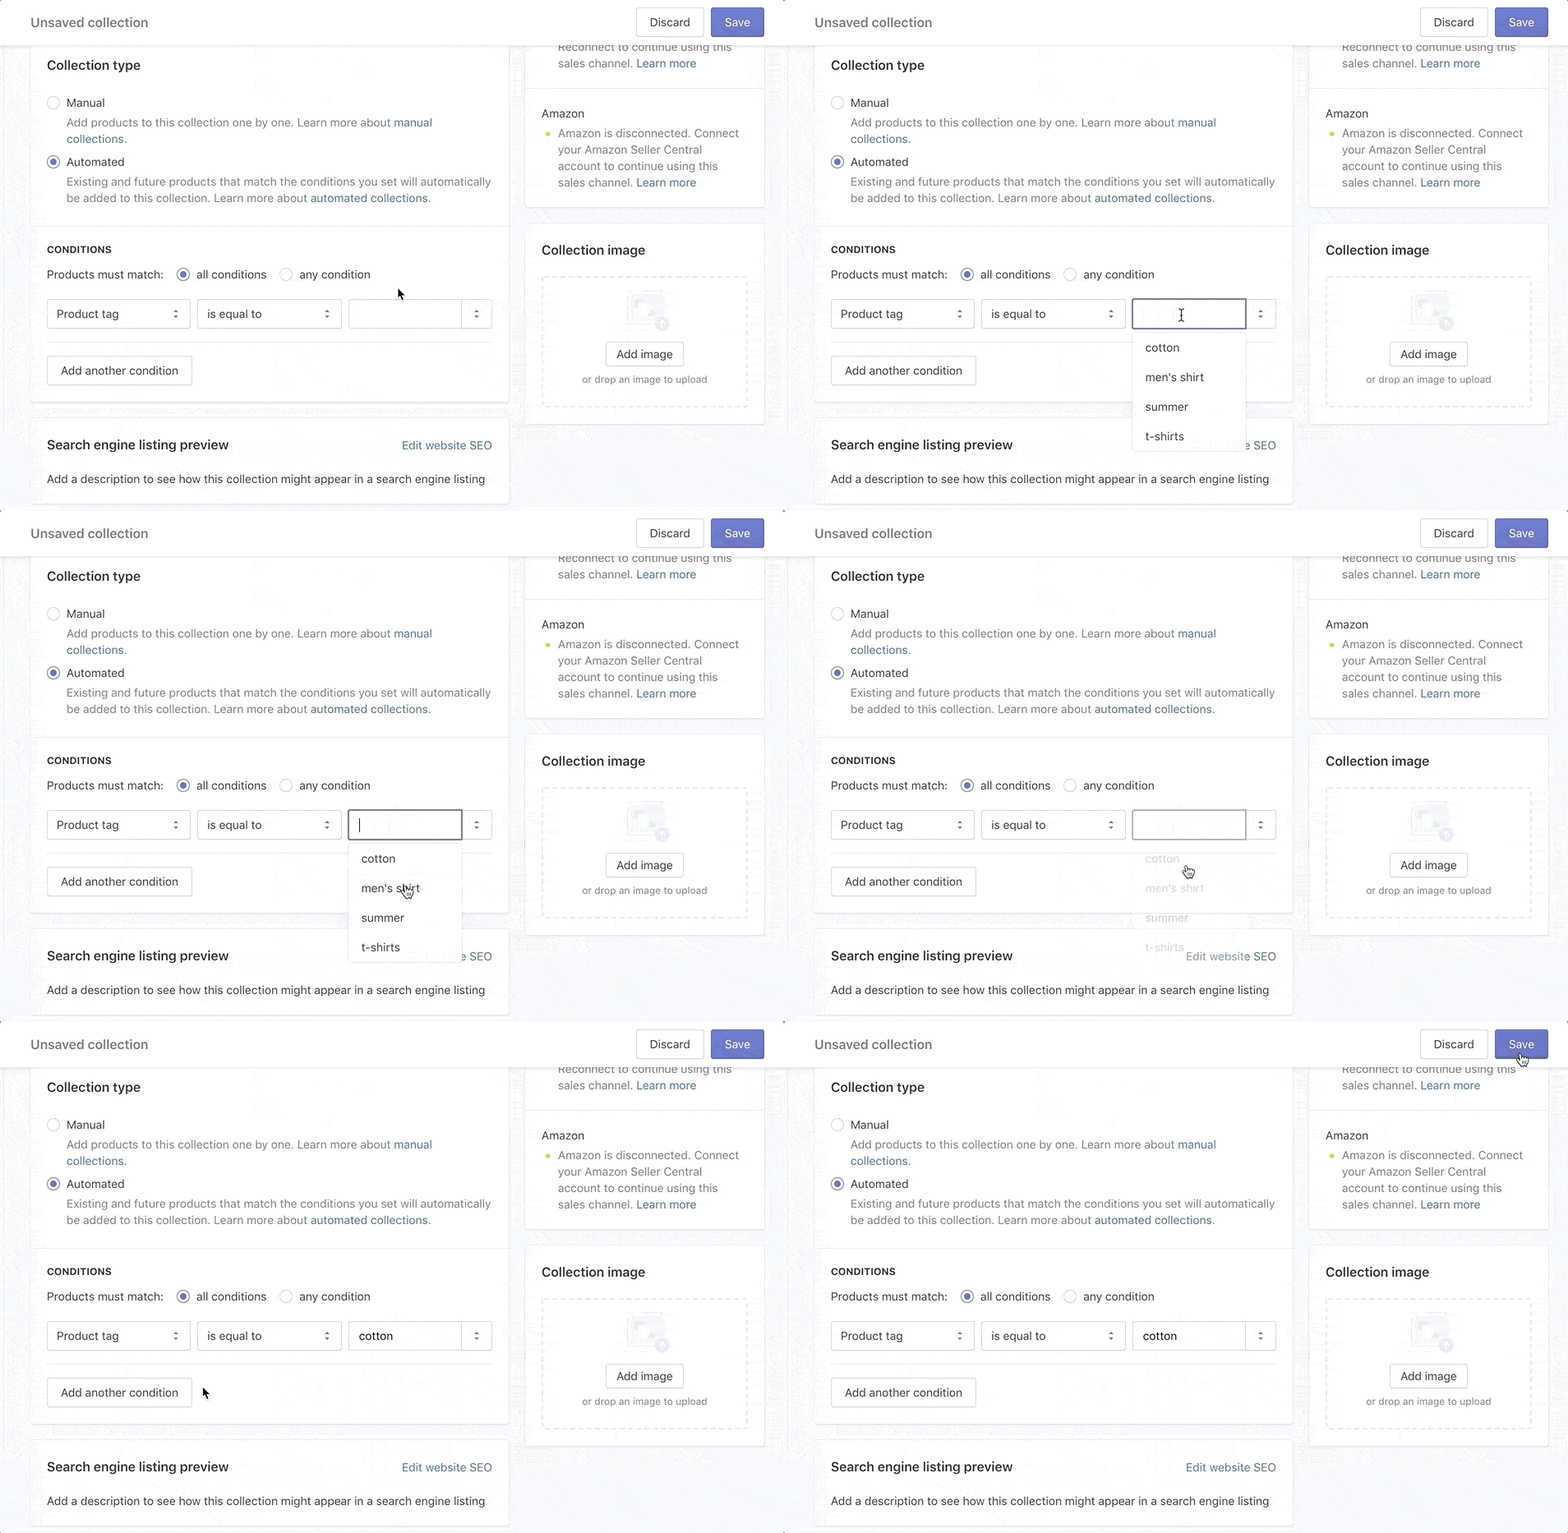
Step #6: Add a condition.
Step #7: Click Save.
You also have the option to edit the preview in your search engine listing of the collection. Adding an image to the collection is optional as well.
To edit, add conditions, change the publish date, or delete an automated collection, simply go back to your “Collections” page under the “Products” menu and select the collection you want to modify.


Comments
This tutorial explains how to add a collection to Shopify. The important question is how to delete or add a collection from product when it was migrated from another platform incorrectly or just because you no longer want that product in the collection that was automatically chosen.