

The main purpose of adding a blog to your Shopify store is to generate traffic and get the word out about your store. Writing good content on your blog is just one step of the process – the next step is to make it easy for your readers to share that content with their friends.

The Tweet Button
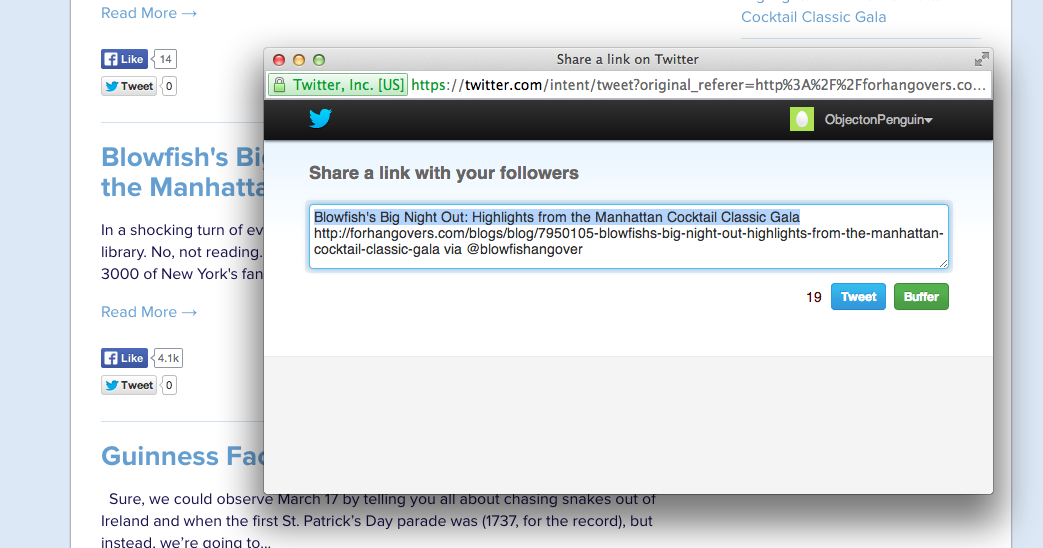
The main benefit of adding a Tweet button is that you can pre-define what message you want your followers to Tweet, making it even easier for them to share your content.
Adding a Tweet button to your Shopify Blog
Note that many themes already come with Social Media buttons on the blog built in. For example, check out the Retina Theme
If you’re using a custom theme or your theme does not have those options built in, you can follow the guide below:
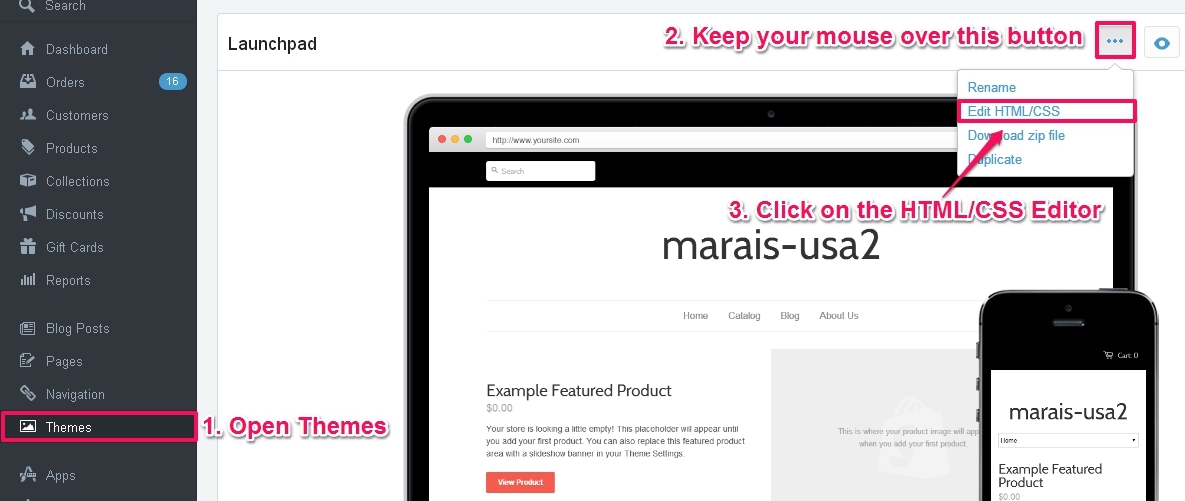
Step 1: From your Shopify store’s admin, go to the Themes section
Step 2: Hover the mouse over the button
Step 3: Click on Edit HTML/CSS
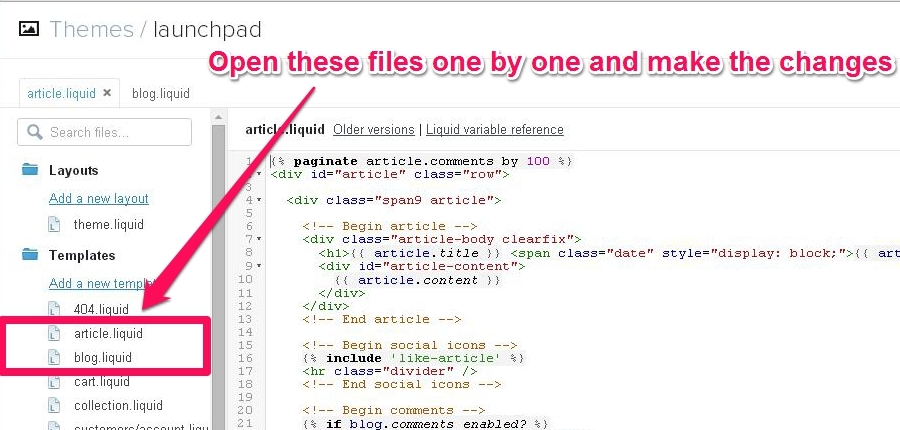
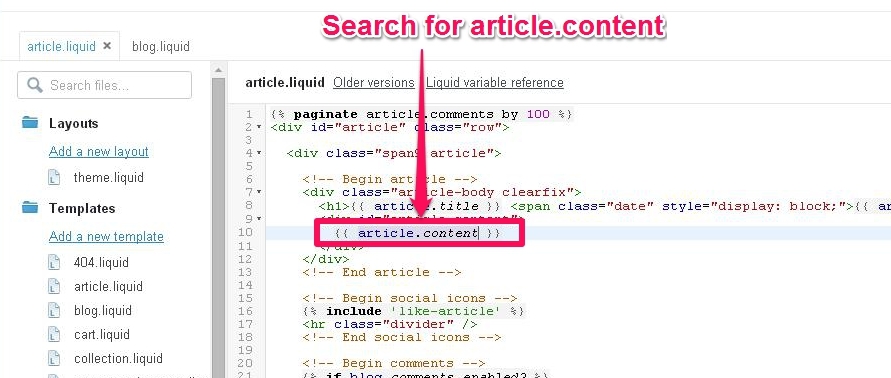
Step 4: Search for the Templates folder, click on article.liquid and blog.liquid to open them in the online code editor. Both templates will be edited in the same way
Step 5: In blog.liquid and article.liquid Search for this code: {{ article.content }}
Step 6: Above the element that outputs the article content, paste the code below:
<script src="https://platform.twitter.com/widgets.js" type="text/javascript"></script>
 <div>
 <a href="https://twitter.com/share" class="twitter-share-button"
 data-url="{{ shop.url }}{{ article.url }}"
 data-via="your_screen_name"
 data-text="{{ article.title | escape }}"
 data-count="horizontal">Tweet</a>
 </div>
In 6th line of above code Replace your_screen_name with your Twitter username but without the @. For example, Shopify’s twitter account name is shopify.
Save your changes.
Repeat the above procedure for both templates.
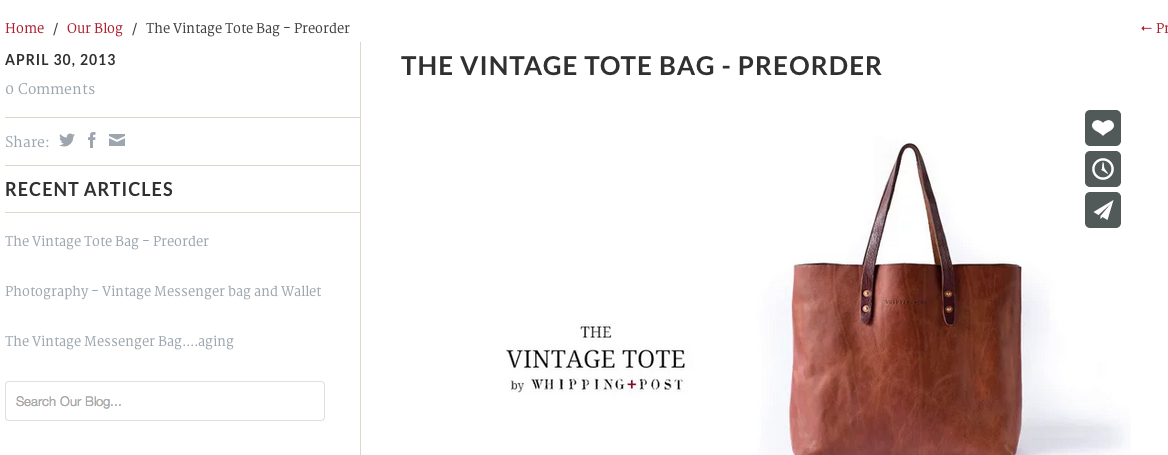
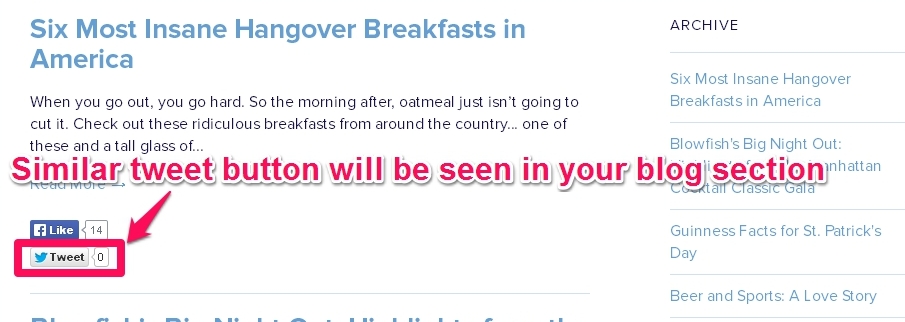
You will be seeing similar tweet button on your blog
Comments