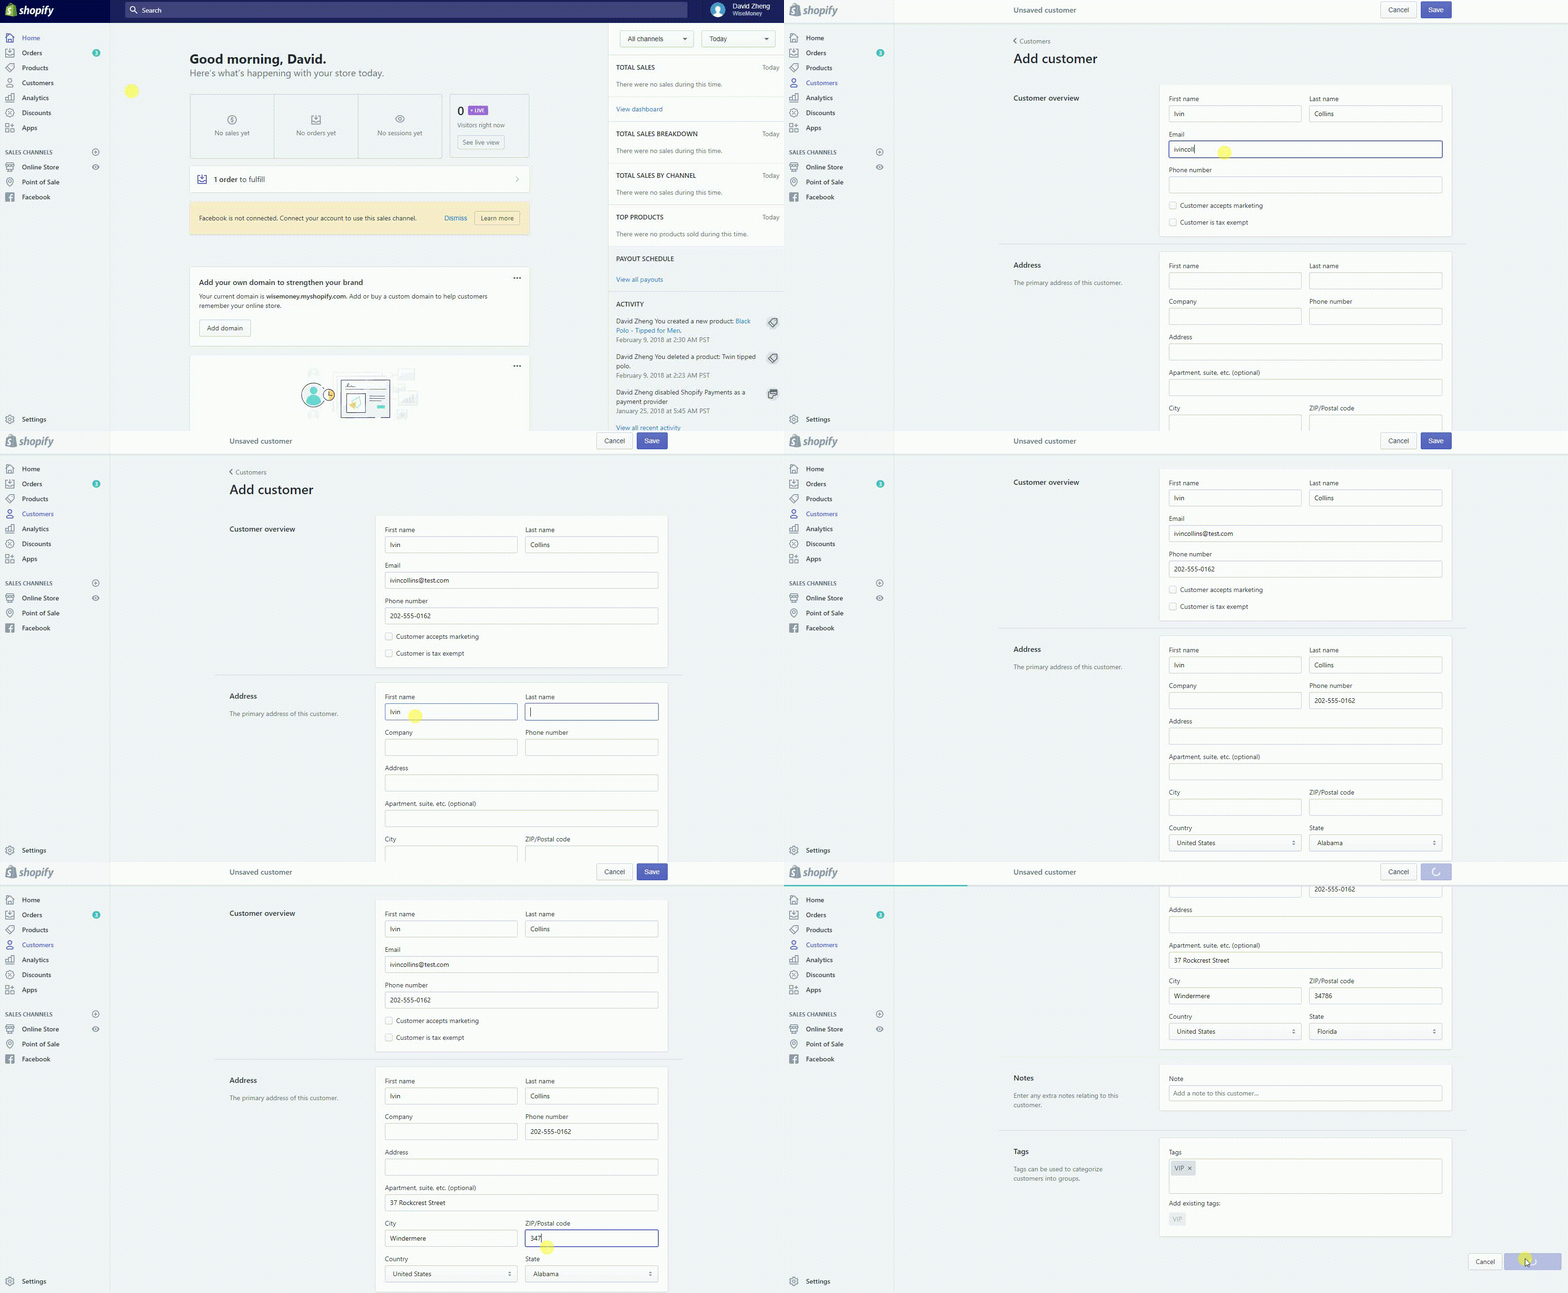
Do you need to add a customer into your Shopify database? Although customers are automatically added to your database, you may find yourself needing to add a person’s information the old-fashioned way.
The ease in adding information is second to none as Shopify allows users to manually add information through its user-friendly interface.
Step #1: Go to your Shopify admin and click “Customers” :
Step #2: Click on the blue “Add a customer” button located in the top right corner:
Step #3: Fill out the customer information fields as completely as possible:
Step #4: If you want to include additional information,you can add “Notes” and “Tags”:
Step #5: Don’t forget to always put a comma after tag text, or hit your enter button. This way, you will always convert the text into a tag.
Step #6: Once you have completed the form, click the blue “Save customer” button.
Simple as that!
Now your new customer will be displayed in your customers’ list alongside all of the automatically generated customers that have populated due to their interaction with your website.


Comments