
Introduction
When it comes to valuable sources of traffic and revenue for any business, email lists are basically the bread and butter.
And making those lists even bigger can enable companies to create viral buzz around new products, and drive quick sales and traffic to new merchandise.
In fact, email marketing is one of the best channels to deliver a high-return on investment.
But growing an email list is often easier said than done.
While they can be effective for sales, building a robust and quality list just doesn’t happen overnight.
Amassing tons of emails for your list in a short amount of time can be tricky, but that doesn’t mean it can’t be done.
What’s more? It needs to be done.
It’s important to focus your efforts on growing your list and making sure that email marketing is a huge part of your online and digital marketing strategy.
And why wouldn’t you? Email marketing produces the highest ROI out of any online marketing channel.
It generates $40 in return for every $1 spent.
So how do you grow your email list without a lot of money and in a short period of time?
Thankfully, you won’t be the first brand or business to ask that question.
There are companies out there who have already accomplished the feat, and taking notes from them means you can replicate their success.
Wee Squeak, a kids shoe brand, only spent $90 on Facebook Ads and was able to capture more than 600 emails!
And luckily for us, they left a blueprint and strategy to follow.
Here’s how Wee Squeak grew their email list using Facebook Ads, and how you can do it too.
How Wee Squeak grew their email list on Facebook
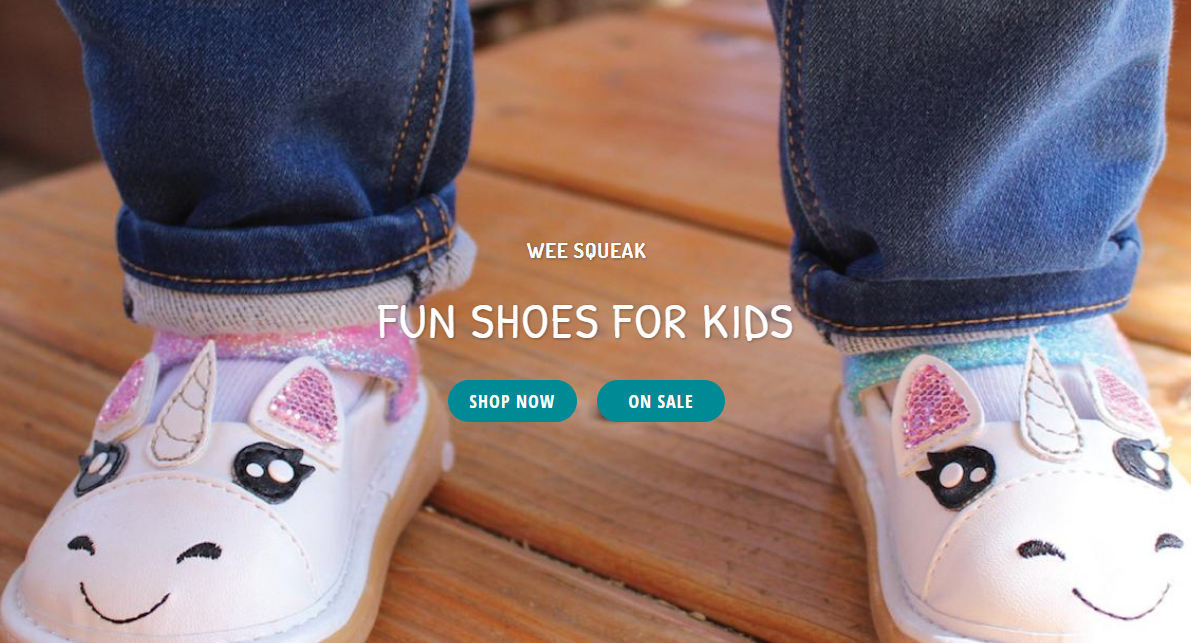
Wee Squeak was founded in 2005 in Dallas, Texas with the mission of creating and providing the best, fun shoes for kids.
They have a product line of dozens of shoes for both boys and girls for sale on their ecommerce site.

But they didn’t find their success by sitting back and waiting for sales to come in.
They also didn’t rely on word-of-mouth marketing or creating a great promotion.
Instead, they focused on growing their email list for leverage to drive a huge number of sales.
Susan Bradley, the President of Wee Squeak, said that creating lead magnets and Facebook Lead Ads was the best way to grow her email list.
She also noted an extremely important factor that people often overlook:
People don’t buy your product immediately. They buy when it’s convenient.
For example, just take a look at the typical buyer’s journey, as described by HubSpot:
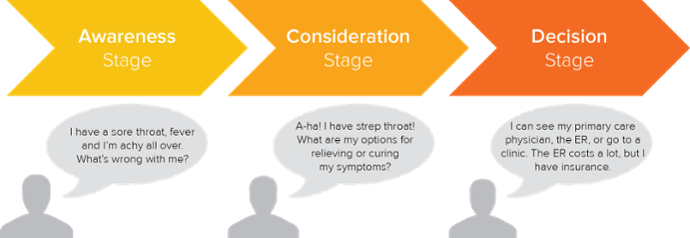
The buyer’s journey confirms that instant sales aren’t the norm.
People who have never heard of you before won’t buy the first time they see your product.
Why? Because they don’t know you yet. They don’t know your brand, your goals, your mission, or really anything besides the product you sell.
The buyer’s journey happens in stages:
Awareness: The customer becomes aware of a problem they have, and they develop a need to fix that problem
Consideration: The customer starts to browse different outlets for fixing that problem
Decision: They make a final conversion action or buying decision on a single product.
These stages mean that simply targeting someone who has never heard of your company with a product-based purchase ad won’t get conversions.
They aren’t going to shell out $50 for a product they know nothing about.
And that’s why Susan decided to implement ads and events on Facebook to collect leads.
She didn’t want to keep spending money on specific ads for every stage of the buyer’s journey.
Instead, she wanted to create ads and events that would drive tons of email sign-ups and allow her to send more marketing messages for free.
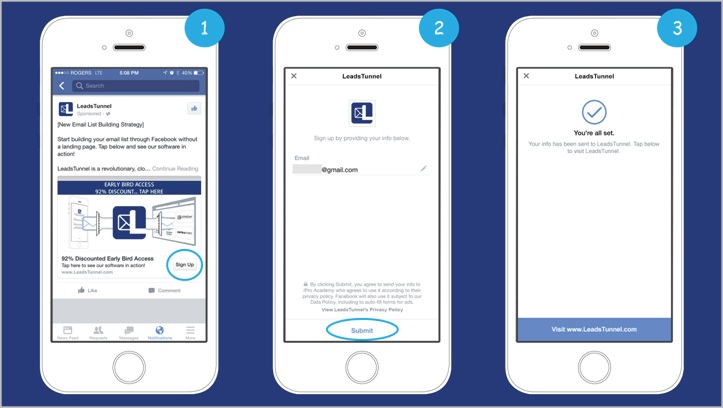
So she started to use Facebook Lead Ads.
If you aren’t familiar with lead-based ads, here’s an example:
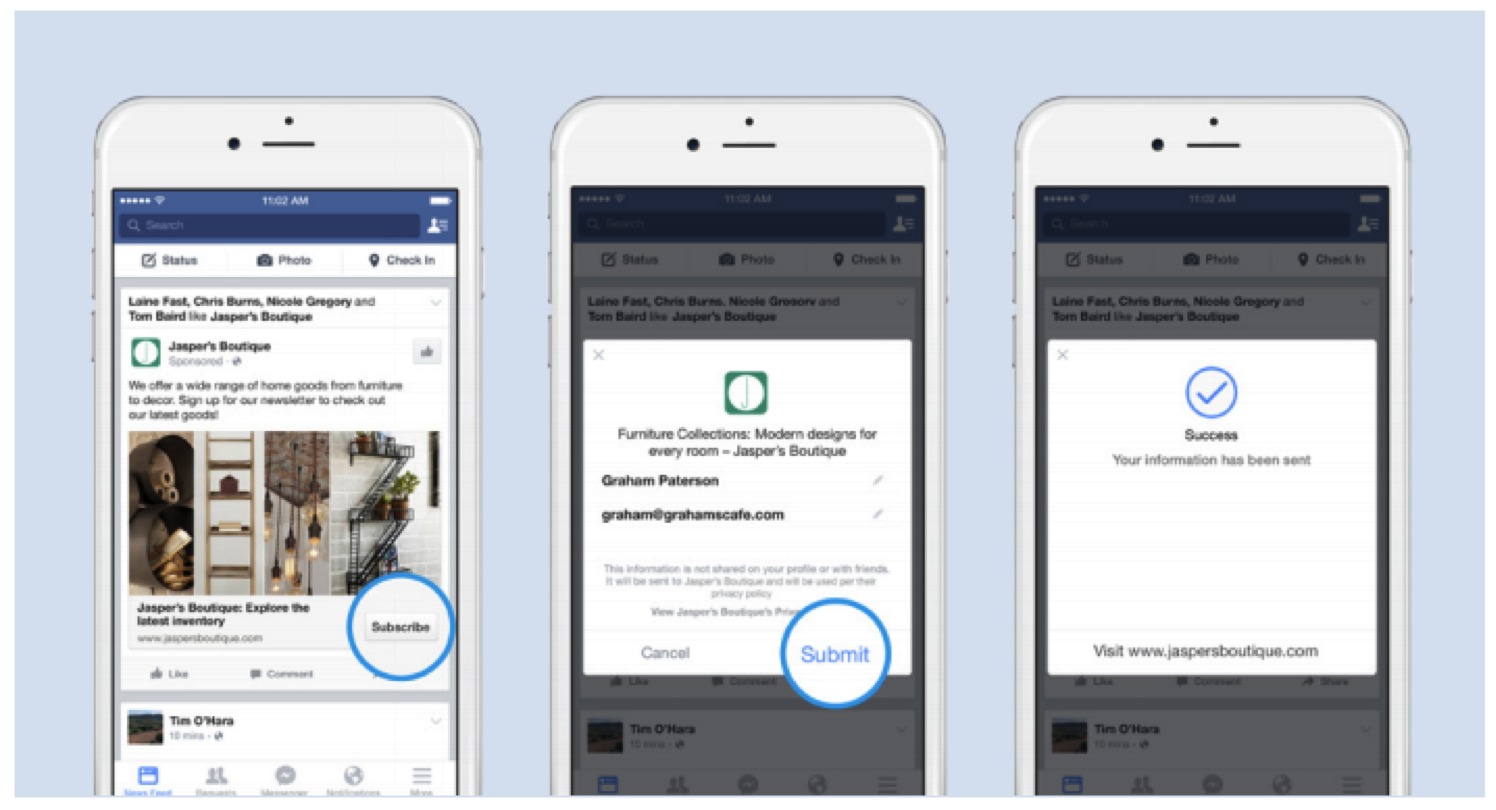
They focus on driving form submissions in a natural way entirely on Facebook’s platform.
You can easily have people download a lead magnet or receive a coupon in exchange for their email address.
Susan said that using lead magnets was one of the best ways she collected emails.
She then created multiple audiences based on various interests that were similar to Wee Squeak.
For example, she researched companies that produced similar engagement.
Lastly, she split-tested her ads on Facebook to see which audience was performing the best and had the lowest cost.
Using only $5 per day she was able to grow her email list to more than 600 submissions.
And her plan to do it is something anyone can copy.
Here’s how you can use Facebook Ads to increase your email signups with only a $90 budget.
How you can grow your email list with Facebook Ads
Growing an email list through Facebook Ads isn’t always cheap.
But with some of the hacks that Susan used, you can quickly reduce your ad spend and optimize your ads for email collection.
Just follow a few quick steps.
Step 1. Create audiences based on interests and exclusions
The first move that Susan made to capture emails with Facebook Ads was developing a specialized audience.
She took the time to research what her audience was interested in.
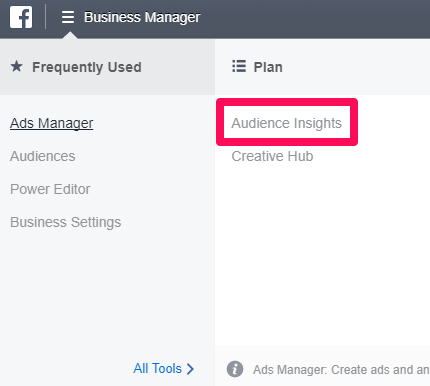
One of the best ways to do this is by researching different interests on Facebook’s Business Manager platform.
To do this, navigate to the “Audience Insights” tab under the “Plan” section:
This tool will give you tons of helpful information on your current Facebook Page audience and any interests you want to explore.
You can get all sorts of helpful data on your current Facebook Page fans from demographics to page likes, household income data, and more:
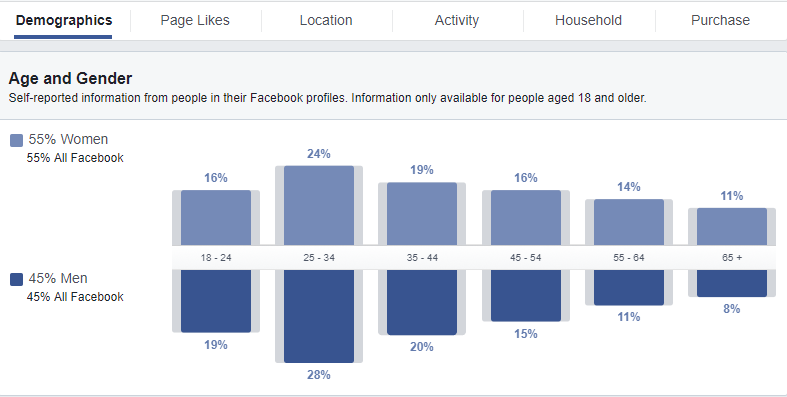
Make sure to make detailed notes of this section because you will use all of this information to create a new audience to target!
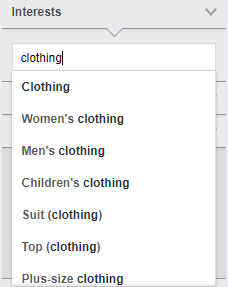
Another way to research interests around your topic for a second audience is to use the interest and exclusions section on the left-hand side of your audience insights tool:
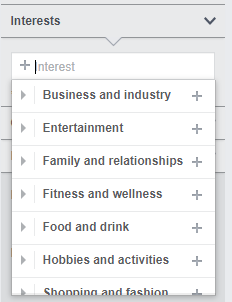
Simply type in a hobby, style, brand, or topic to get some ideas:
When you add various interests, your demographic data on the insights tool will update to that selected interest.
This means you will have no data on age, gender, income, and page likes.
Use this information to create multiple audiences with interests surrounding these popular brands that are similar to yours.
This will help you capture tons of qualified leads that are going to be interested in your products!
They simply don’t know you exist yet, but based on the demographic data, they should be into what you’re selling.
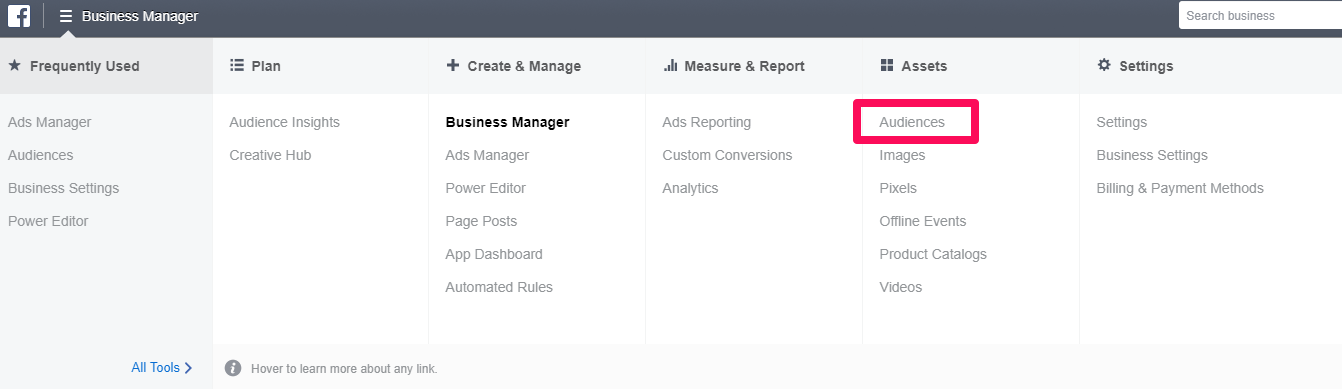
Next, you need to create a new audience.
Click on the “Audiences” tab under your tools section:
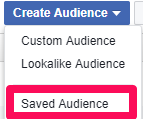
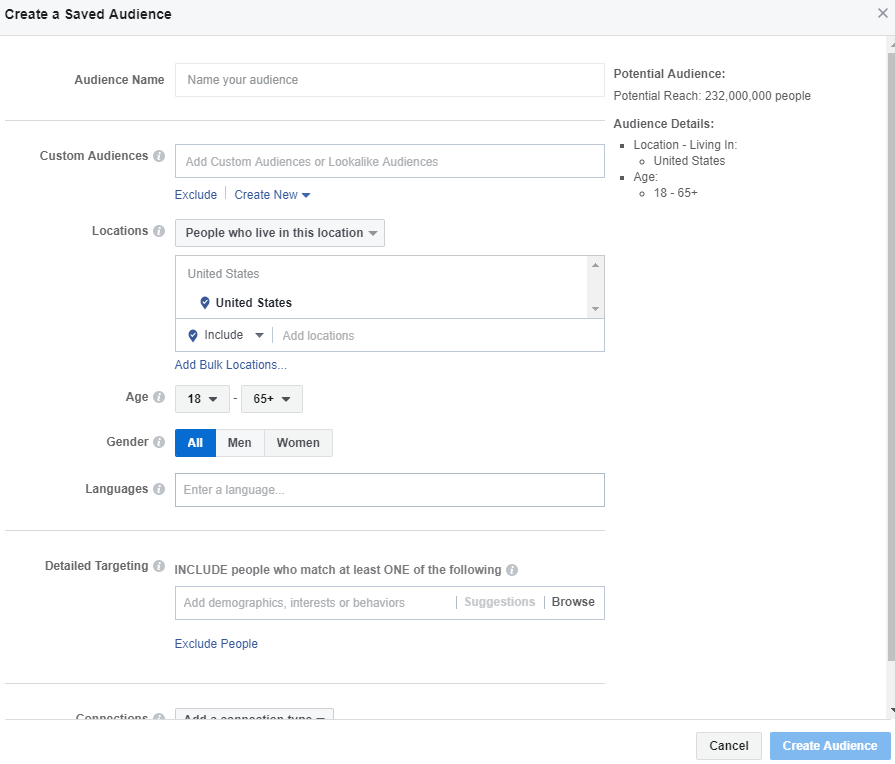
Then, you want to create a new “Saved Audience:”
By using the saved audience, you can now put that demographic and user data to work:
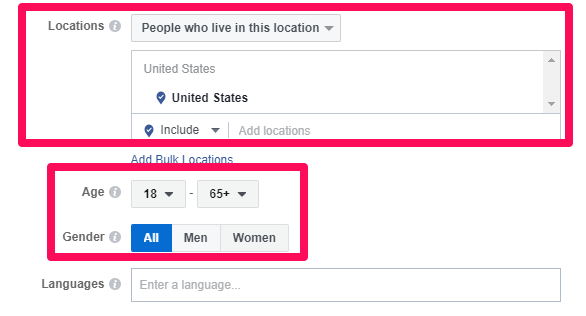
Start by filling out the basic demographic data for your first audience.
This is the data that you collected from your brand Facebook Page, not using the interests section.
Input that data before moving to the next step:
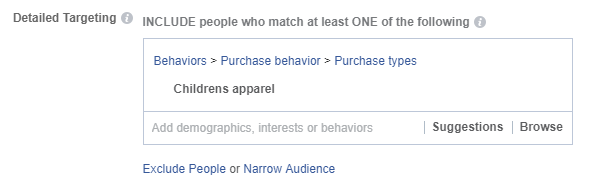
Once you’ve filled out your demographic page data, you can start to add interests and exclusions based on your typical customer.
For example, if your customer is heavily into clothing for children, you can select that as an interest:
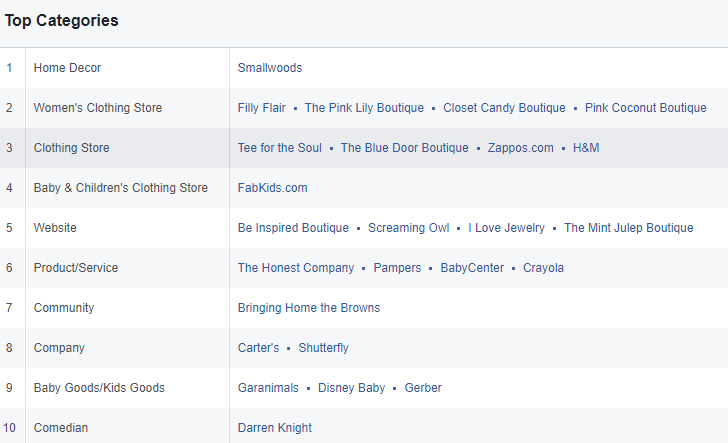
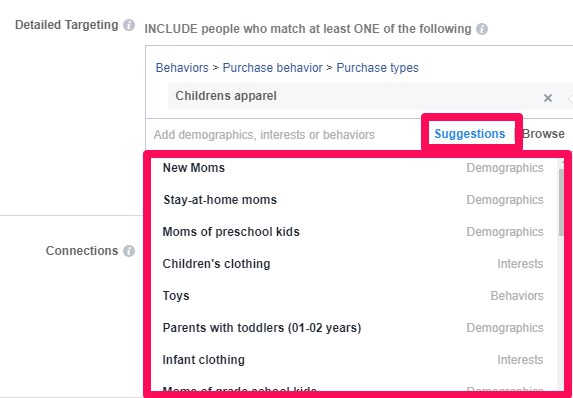
If you need more ideas, simply click the “Suggestions” tab to get instant choices for related interests:
This will help you increase your targeting specificity and get better-suited audiences for your products and ads.
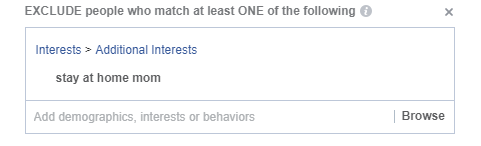
Next, you can start to exclude people based on customers that you never close.
If you notice that stay-at-home moms don’t buy from you, for instance, exclude them:
Once you’ve created an audience with your typical demographics and interests, you can create a second one.
Creating multiple audiences is crucial for reducing ad costs and perfecting your targeting.
The more relevant the ad is, the less it will cost!
After you have created multiple audiences, move to step two.
Step 2. Create Lead Ads to capture emails
Lead ads are one of the best ways to capture potential customers’ information on Facebook.
You can start to create lead ads directly from the Facebook Ads Manager.
They integrate seamlessly into the user experience and convert at high rates:
Susan credited lead ads as one of the best ways to drive new signups and grow email lists.
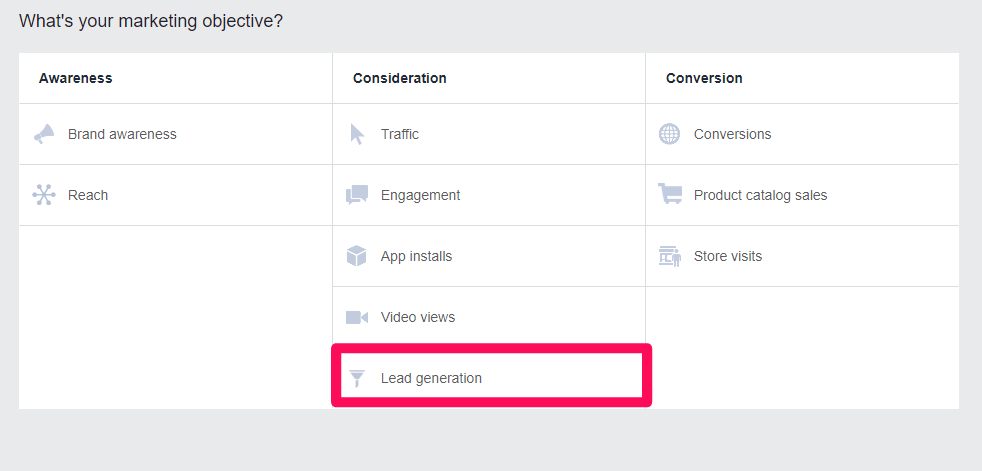
To get started, open up the Facebook Ads Manager and create a new advertisement campaign:
Next, select “Lead generation” as your marketing objective:
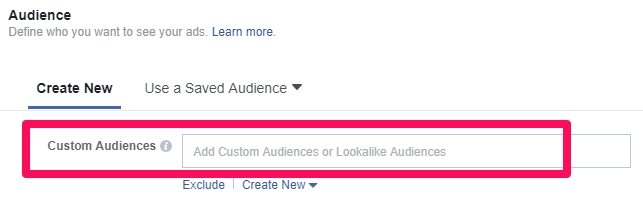
Scroll down to the audience section to select the saved audience that you just created:
Next, you need to select the ad format:

For collecting leads on Facebook Ads, the best formats are single image, video, or slideshow.
Using a carousel can be overwhelming, and the use of multiple CTAs will likely drive users away.
Next, it’s time to edit your lead ads with text, images, and your offer:
Be sure to make a compelling offer that will entice people to sign up.
These could include:
- Coupons
- Discounts
- Gift cards
- Giveaways
A lead magnet is meant to incentivize users to give you their information.
Remember: this should be free. If you want their email, you can’t ask for them to buy. Their email is currency here. Give them something in return.
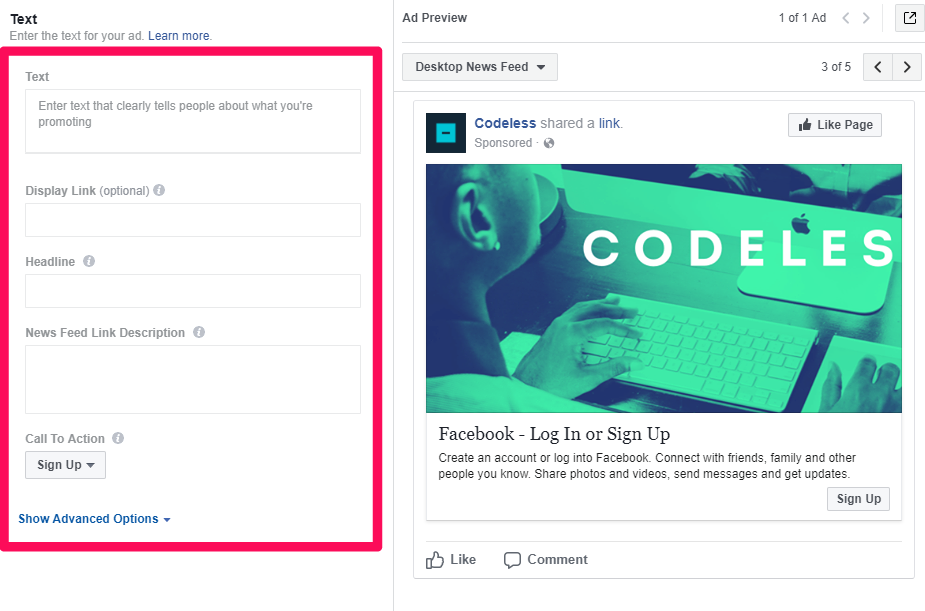
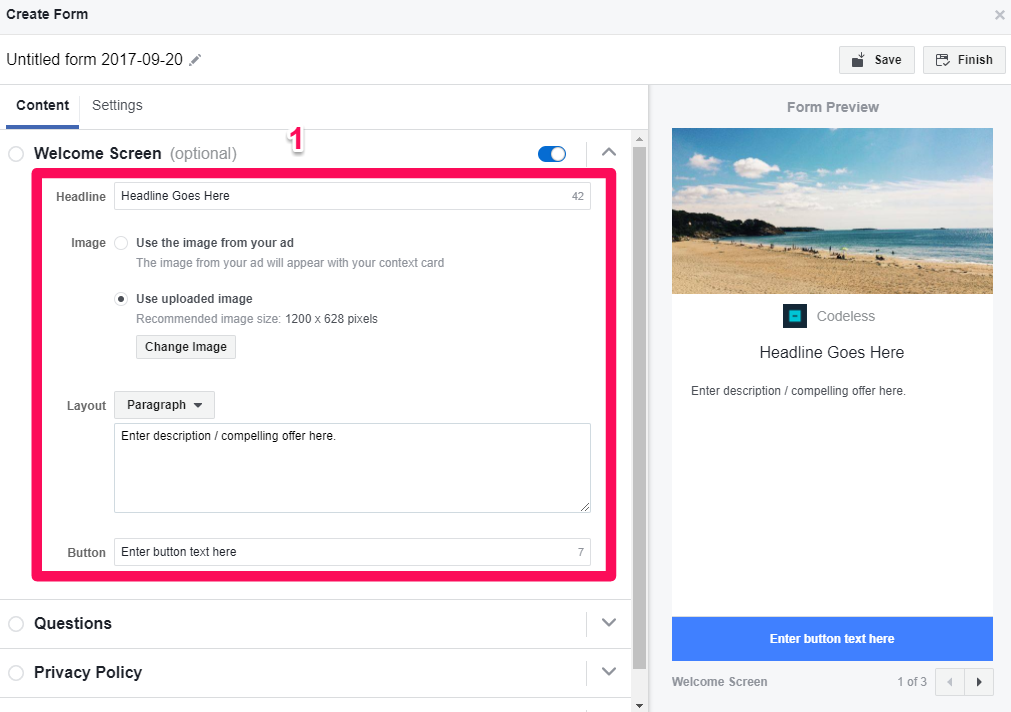
Once you’ve created the look of your lead ad, it’s time to fill in the details.
Start by giving the lead ad a headline, image, description, and call to action:
Next, under the “Questions” section, decide what form fields you want to include in the ad:
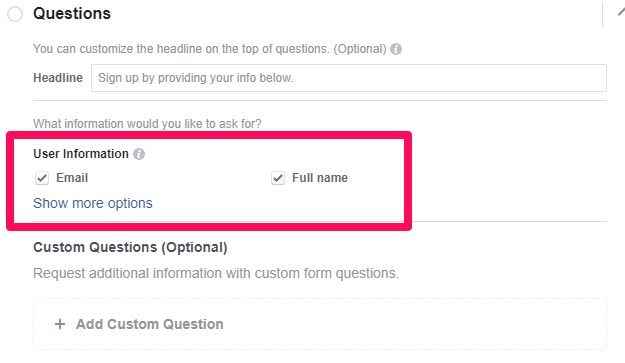
Be sure to keep this simple so that you don’t drive away potential conversions with too many questions.
Lastly, edit the “Thank You Screen” to drive traffic back to your site to use their new coupon or discount:
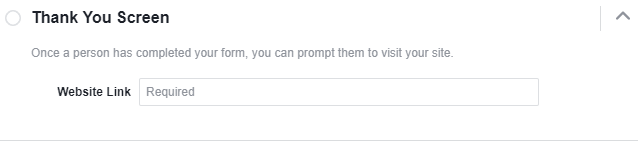
Lead ads are a great way to collect emails and drive sales at the same time.
The thank-you page allows you to direct these new leads straight to your products to use any new coupon or offer you gave them.
Next, it’s time to split-test audiences.
Step 3. Split-test Lead Ads by audience to reduce costs
Susan said that split-testing her audiences gave her the ability to dramatically drive down costs.
And it makes sense:
The more relevant your ad is to the right audience, the cheaper your costs will be.
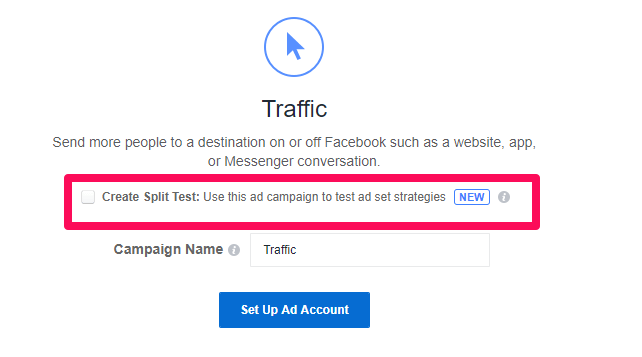
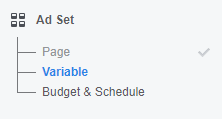
To do this, scroll back up on your lead ad page and click “Create Split Test:”

This will allow you to target the same ads to multiple audiences.
Next, scroll down to the “Variable” section under your ad sets:
Under the variable testing section, select the “Audience” option:
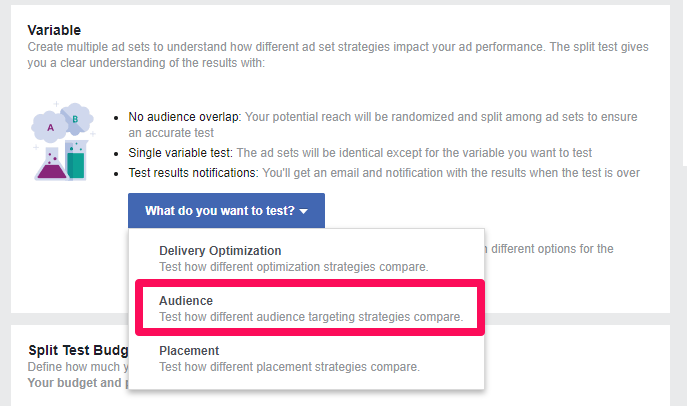
This will help you test how different audiences perform for the same ad.
It will tell you if one audience is cheaper and converting at higher rates!
To adjust your audiences, scroll down and edit each audience variable to choose the audiences you created earlier in this guide:
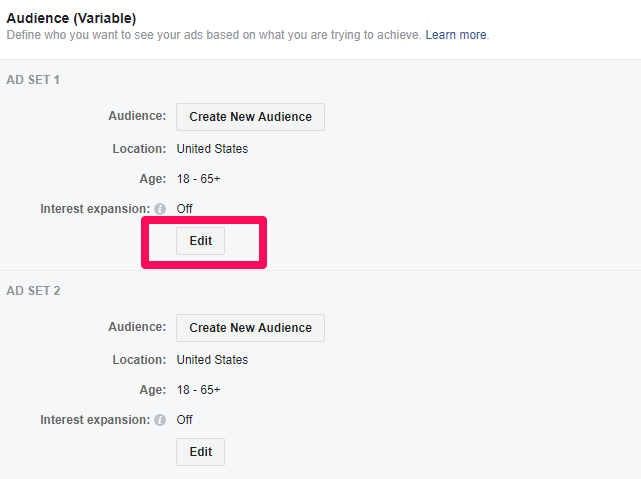
Next, hit accept and you are ready to start testing your new audiences to see which performs best.
Once you’ve done this, it’s time to automate.
Step 4. Automate costs with rules
Facebook Ads can cost a ton of money if you aren’t monitoring them enough.
But this case study is all about cutting costs and getting leads.
Luckily, Facebook has a “Rule” feature that allows you to automate your budget and spend as little money as possible.
To get started, navigate back to your ads manager and click “Create Rule:”

From here you can create hyper-specific rules that will help you manage your budget.
For example, let’s say your cost per result (cost per lead with a lead ad) was more than $3 and that was too much.
You could tell Facebook to adjust your budget or bid accordingly without having to do it yourself.
You can automate the process of decreasing your budget when costs are too high.
To do this, hit “Create Rule” and choose a specific condition:
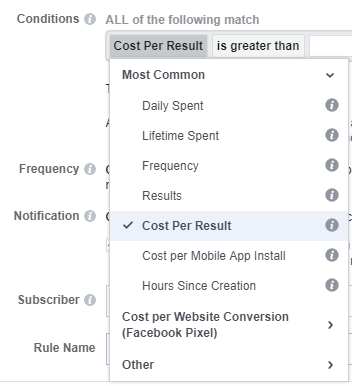
Conditions are going to be the trigger in this automation sequence.
For example, when the cost per result is greater than X, it will trigger a resulting action.
That action is defined as any of the following automation options:
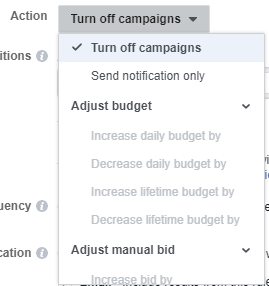
Think of these rules as a simple “If, then” statement. In this case, the following image would read:
If my cost per result is above $5, then decrease my bid by 15%.
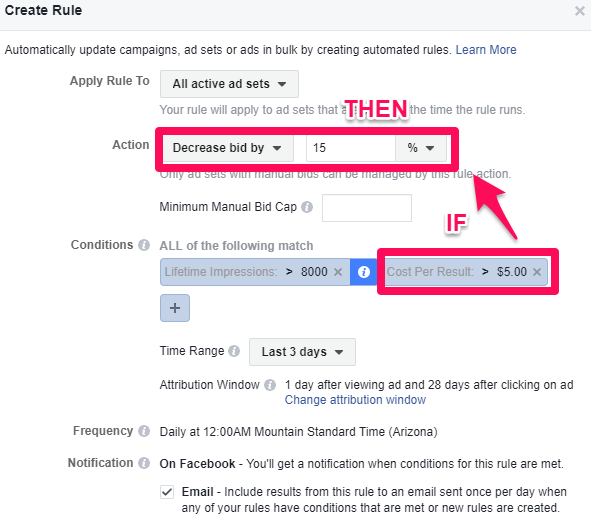
Make sense?
The goal here is to reduce costs at all possible points on your ad spend.
Use the rules tool to automate processes that you otherwise would spend hours doing.
If something is costing too much, pause the ad, audience, or adjust the bid accordingly with a rule.
Final thoughts…
A good email list can be the key to growing your business and keeping your revenue churning.
And time spent in building a quality list can reap long-term rewards.
But the process can be tough.
Luckily, if you take a page from the Wee Squeak handbook, and follow the steps outlined in this article, you can grow it in less time, and on a budget.
What are your favorite methods to growing an email list? How do you take advantage of email lists?
Comments