

Introduction
Menus are a great way to optimize the navigation of your online store. Your menu can link to any landing page on your site, such as product pages, blogs, or contact information.
User experience always needs to be taken into consideration when it comes to your site navigation. Just because you add something to your menu today, it doesn’t mean that it needs to stay there forever. You may eventually decide to remove or edit options from your menu.
In this tutorial, I’ll show you exactly how to add, remove, and edit menu items in Shopify.
Add Menu Items
Adding a new item to your Shopify store menu is easy. Just follow along with these simple steps below.
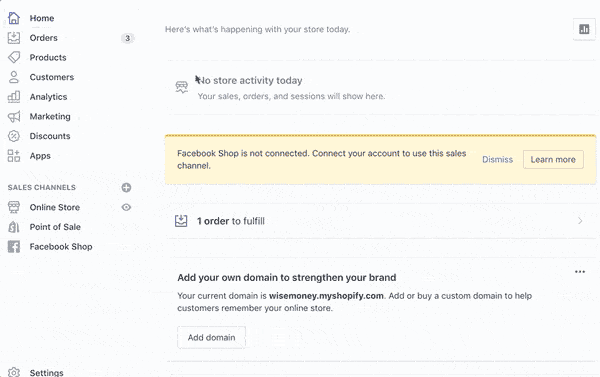
Step #1: Select “Online Store” from your Shopify admin page.
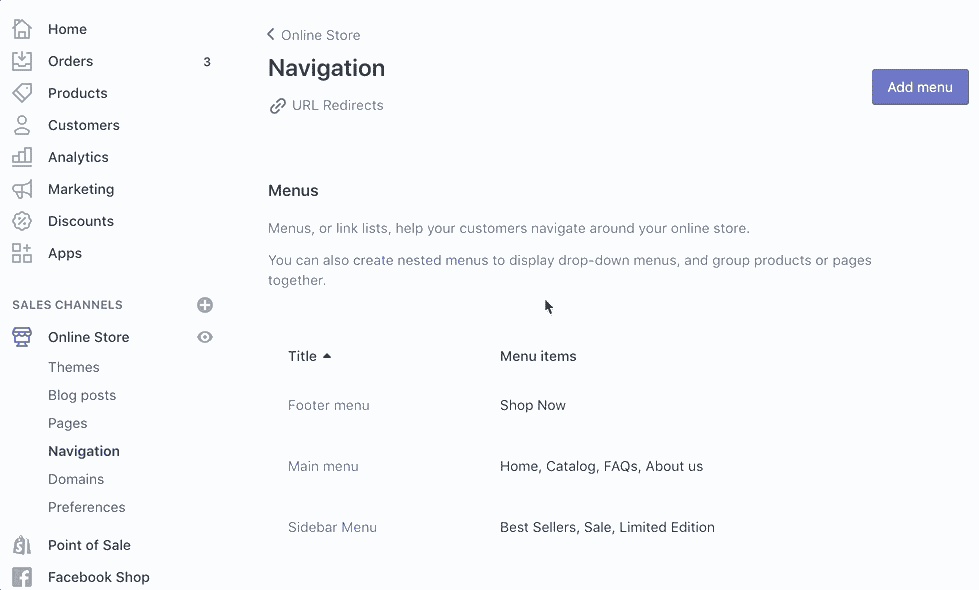
Step #2: Choose “Navigation” from that sub-menu.
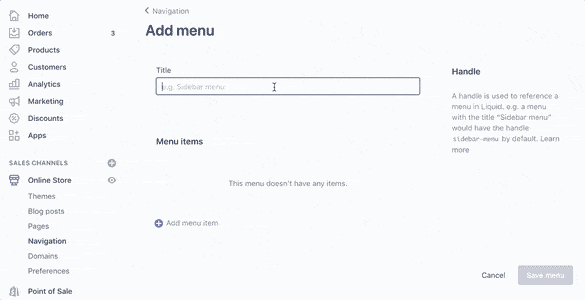
Step #3: Click “Add Menu” at the top right of the screen.
Step #4: Give your menu a title.
Step #5: Click “Add Menu Item.”
Step #6: Name the menu item.
Step #7: Select the destination link.
Step #8: Save your changes.
Alternative option to step #7: Rather than choosing the link from the options on your website, you can paste the link of an external site (if applicable).
For email links, use the following format:
mailto:example@yourwebsite.com
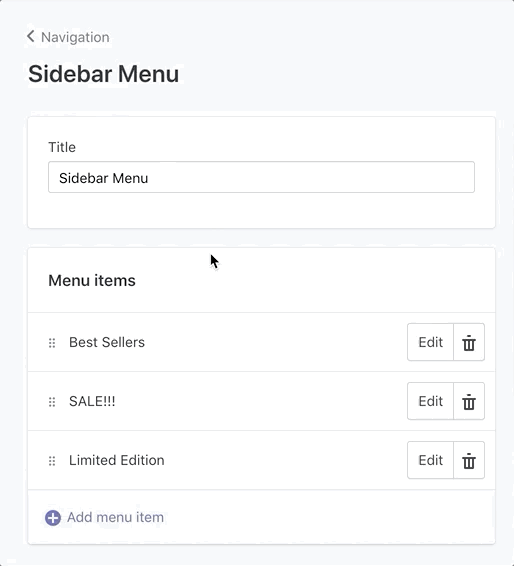
Remove Menu Items
Now that we’ve added menu items to your Shopify store, I’ll explain how you can delete them.
Step #1: Select “Navigation” from the “Online Store” menu of your admin dashboard.
Step #2: Choose the menu title that contains an item you want to remove.
Step #3: Click on the trash can icon of the item that you’re deleting.
Step #4: Confirm by clicking “remove” on the pop-up.
Step #5: Save menu.
Edit Menu Items
You’ll also have the option of editing existing menu items. Maybe you want to change the name or the destination of the link.
Here’s what you need to do:
Step #1: From the navigation dashboard, choose the menu you want to edit.
Step #2: Click “Edit” for the menu item that needs to be changed.
Step #3: Change the name or link destination and apply the changes.
Step #4 (optional): To change the order of menu items, drag and move the menu item by clicking to the left of its name.
Keeping your menus organized will improve the user experience of your Shopify store.
As you’ve seen from this tutorial, adding, removing, and editing menu items isn’t that complicated. Simply follow the steps that I’ve outlined above.
Comments