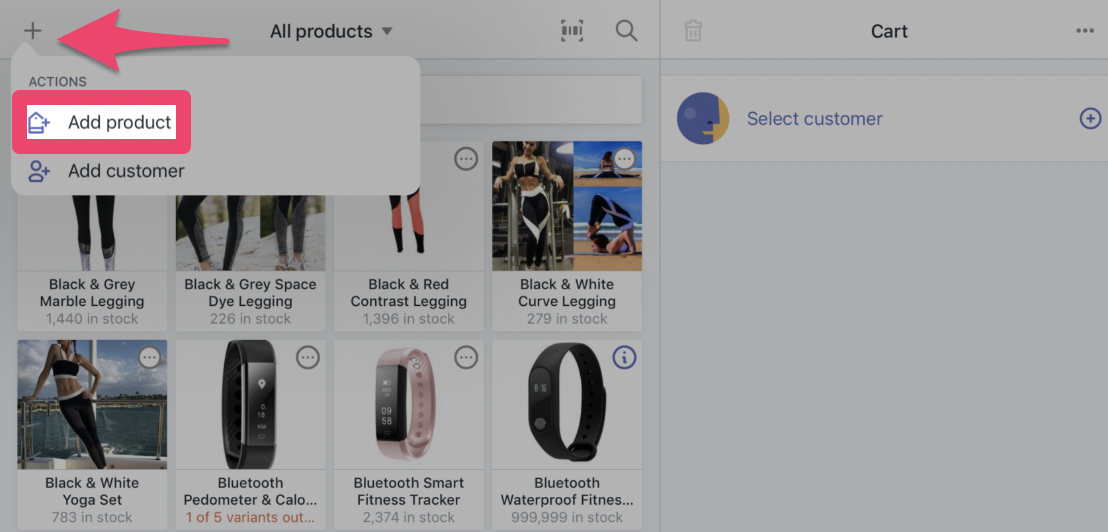
For those of you with physical store locations, you can take advantage of Shopify POS for selling in-person. I’ll show you how to create a new product using Shopify POS.
Note: You must be connected to the Internet when creating new products in Shopify POS.
Step #1: Click on the plus (+) button on the Shopify POS checkout screen.
Step #2: Select “Add Product” from the drop-down menu.


Step #3: Give the product a title.
Step #4: Set a price for the product.
Step #5: Add a product image (Optional: Choose an image from your device or take a picture using the Shopify POS camera).
Step #6: Click “Save Product.”


Once a product has been created with Shopify POS, you cannot edit or change it from this platform. All changes need to be made from your Shopify admin dashboard.
Make sure your new product is stocked for the proper locations. Otherwise, it will not appear on the product view page.
Products created in Shopify POS will not automatically appear on your other sales channels.

Comments