

If you offer returns to your customers, you can send them return labels from your Shopify admin dashboard. Once a label has been created, you can either email it directly to the customer or send them a link.
Note: Return labels are only available for domestic orders in the United States.
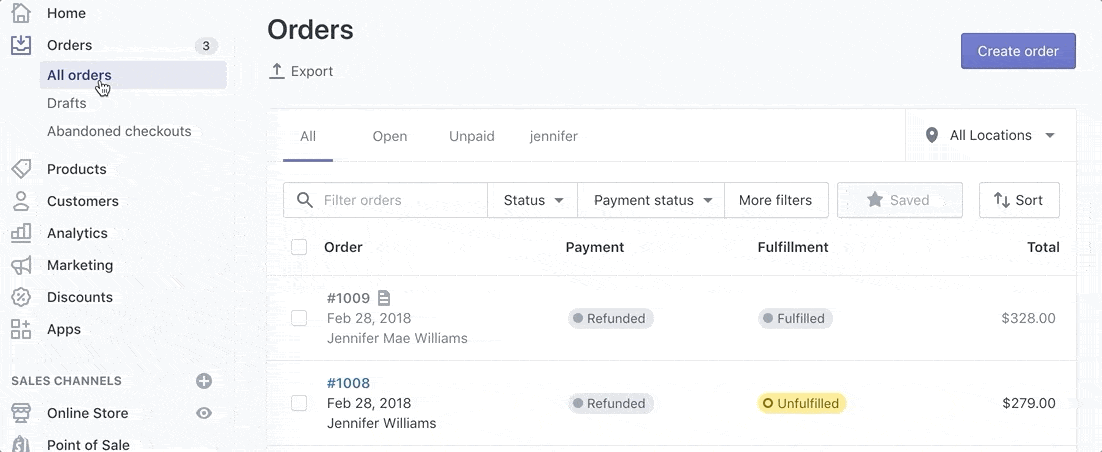
Step #1: Go to the “Orders” page in your Shopify admin.
Step #2: Select an order from the list.
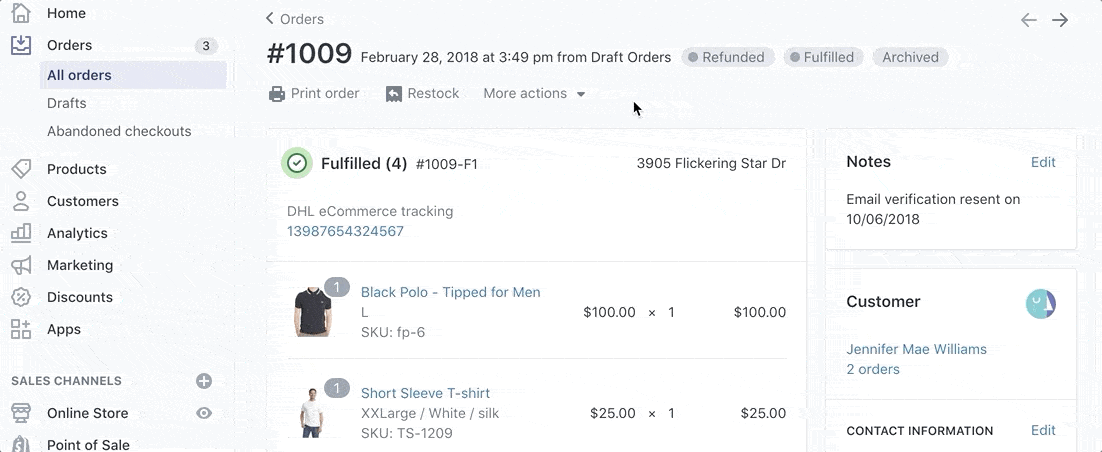
Step #3: Click on “More Actions” and choose “Create Return Label” from the drop-down menu.
Step #4: Choose a return shipping method.
Step #5: Decide how you want to give the label to the customer.
- Email the customer.
- Copy a link and manually send it to an existing email thread or instant message.
- Print the label yourself and send it with the order.
Step #6. Click the “Done” button.
To resend a return label, just click on “View Details” of the “Return Label” section of the order. You’ll be prompted with the same choices from above for how you want to deliver the label to your customer.
You must have at least one fulfilled item in an order to create a return label. Otherwise, you will not see “Create a Return Label” from the “More Actions” menu.
Return labels automatically expire one year after the purchase date. They cannot be voided, but you won’t be charged for unused return labels.
Comments