The number of locations that you’re able to set up depends on the type of Shopify plan that you’re subscribed to.
- Shopify Lite — 3 Locations
- Basic Shopify — 4 Locations
- Shopify — 5 Locations
- Advanced Shopify — 8 Locations
- Shopify Plus — 20 Locations
For those of you who need more than 20 locations, contact Shopify support.
Any apps that you’re using to fulfill orders and stock your inventory are categorized as a location. However, those apps don’t count toward your plan limits.
To set up a location, follow these steps:
Step #1: Go to your Shopify “Settings” page.
Step #2: Select “Locations” from the menu.
Step #3: Click “Add Location.”
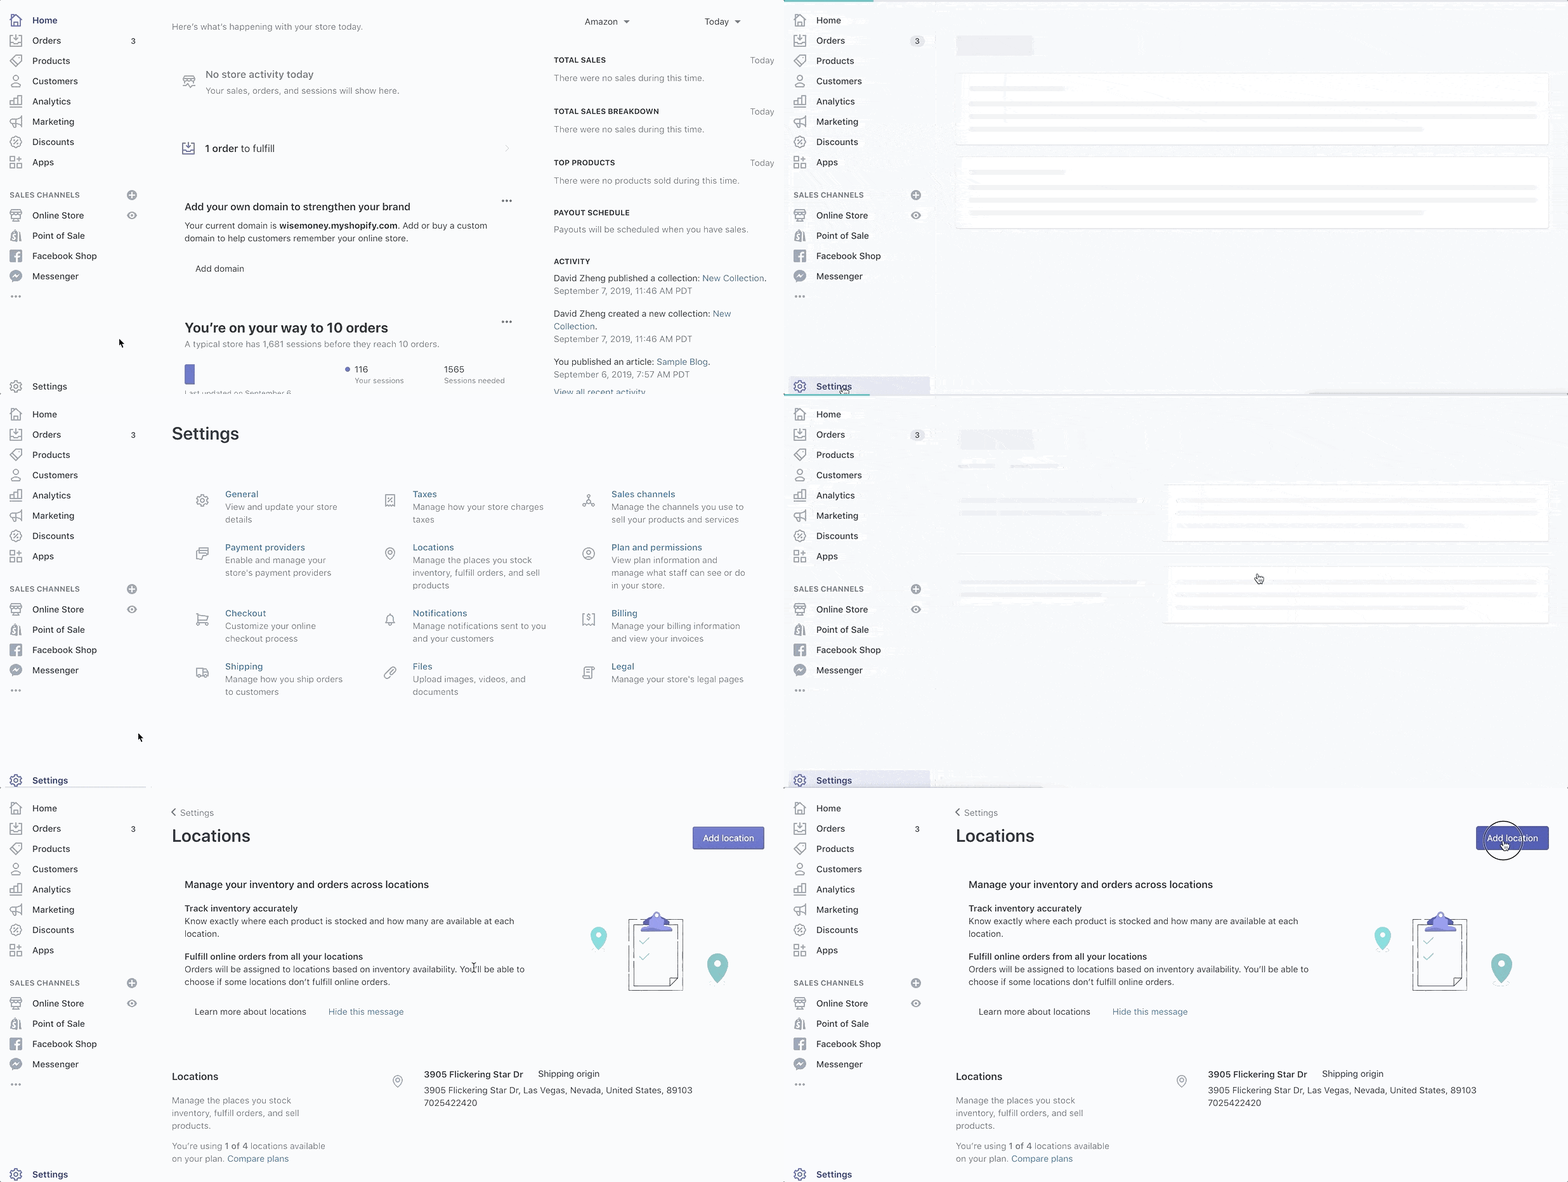


Step #4: Name your location.
Step #5. Input the address information.
Step #6: Enable “Fulfill Online Orders From This Location” if you want the inventory at this location to be used for online sales.
Step #7: Save your changes.
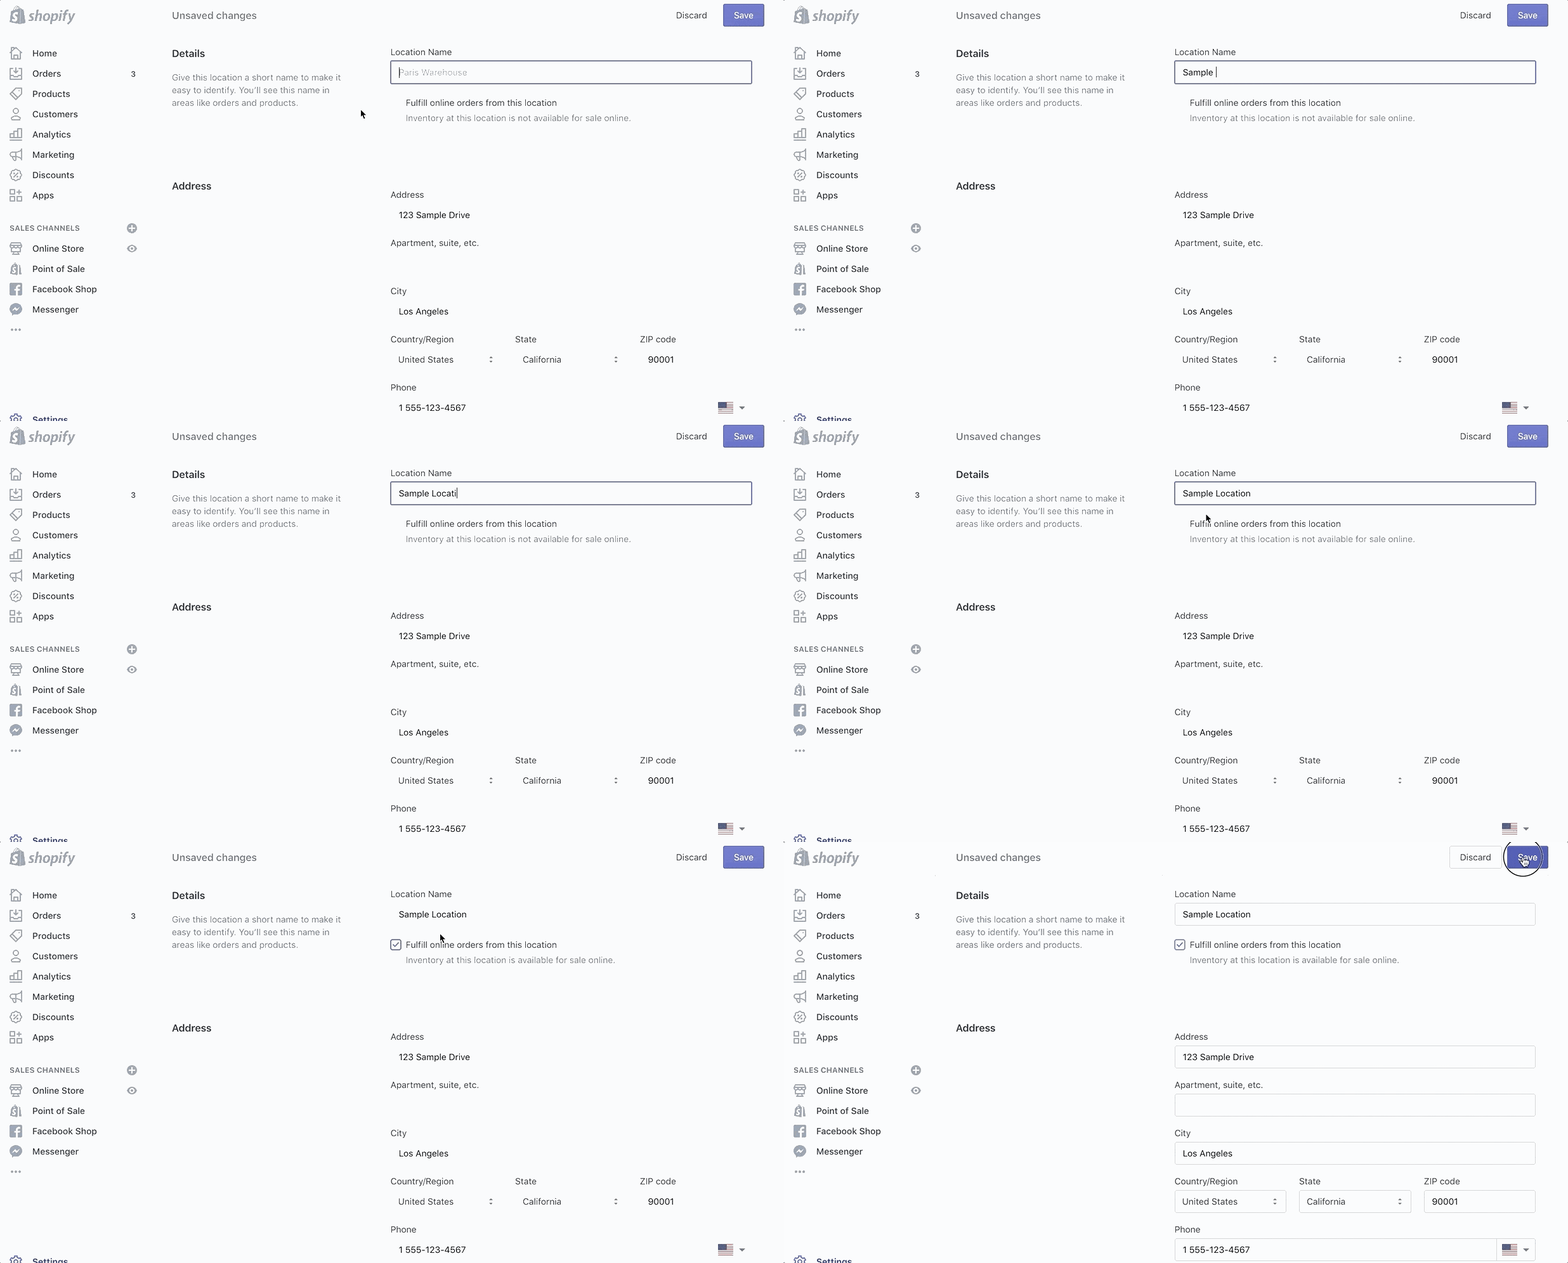


Each time you add a new location, it goes to the bottom of your fulfillment priorities.
To prevent a location from fulfilling online orders, simply click on the location to edit it and unselect the “Fulfill Online Orders From This Location” box.
You can also deactivate locations that you no longer want to use. This can either be permanent or temporary. Just click on the “Deactivate Location” button.


Any locations that have been deactivated will not count toward your location limits defined by your Shopify plan.
How to Set the Priority of Locations For Order Fulfillment
You must specify the priority of your location fulfillment centers if you have multiple active locations. Whenever an order is fulled through any of your sales channels, they will be fulfilled from the location based on your priority sequence.
By default, inventory will always be taken from a location that can fill the whole order (even if it’s lower on the priority list).
Step #1: Go to the “Locations” page from your “Settings” menu.
Step #2: Click “edit fulfillment priority” in the “fulfillment priority” section of the page.
Step #3: Drag the locations to change the priority.
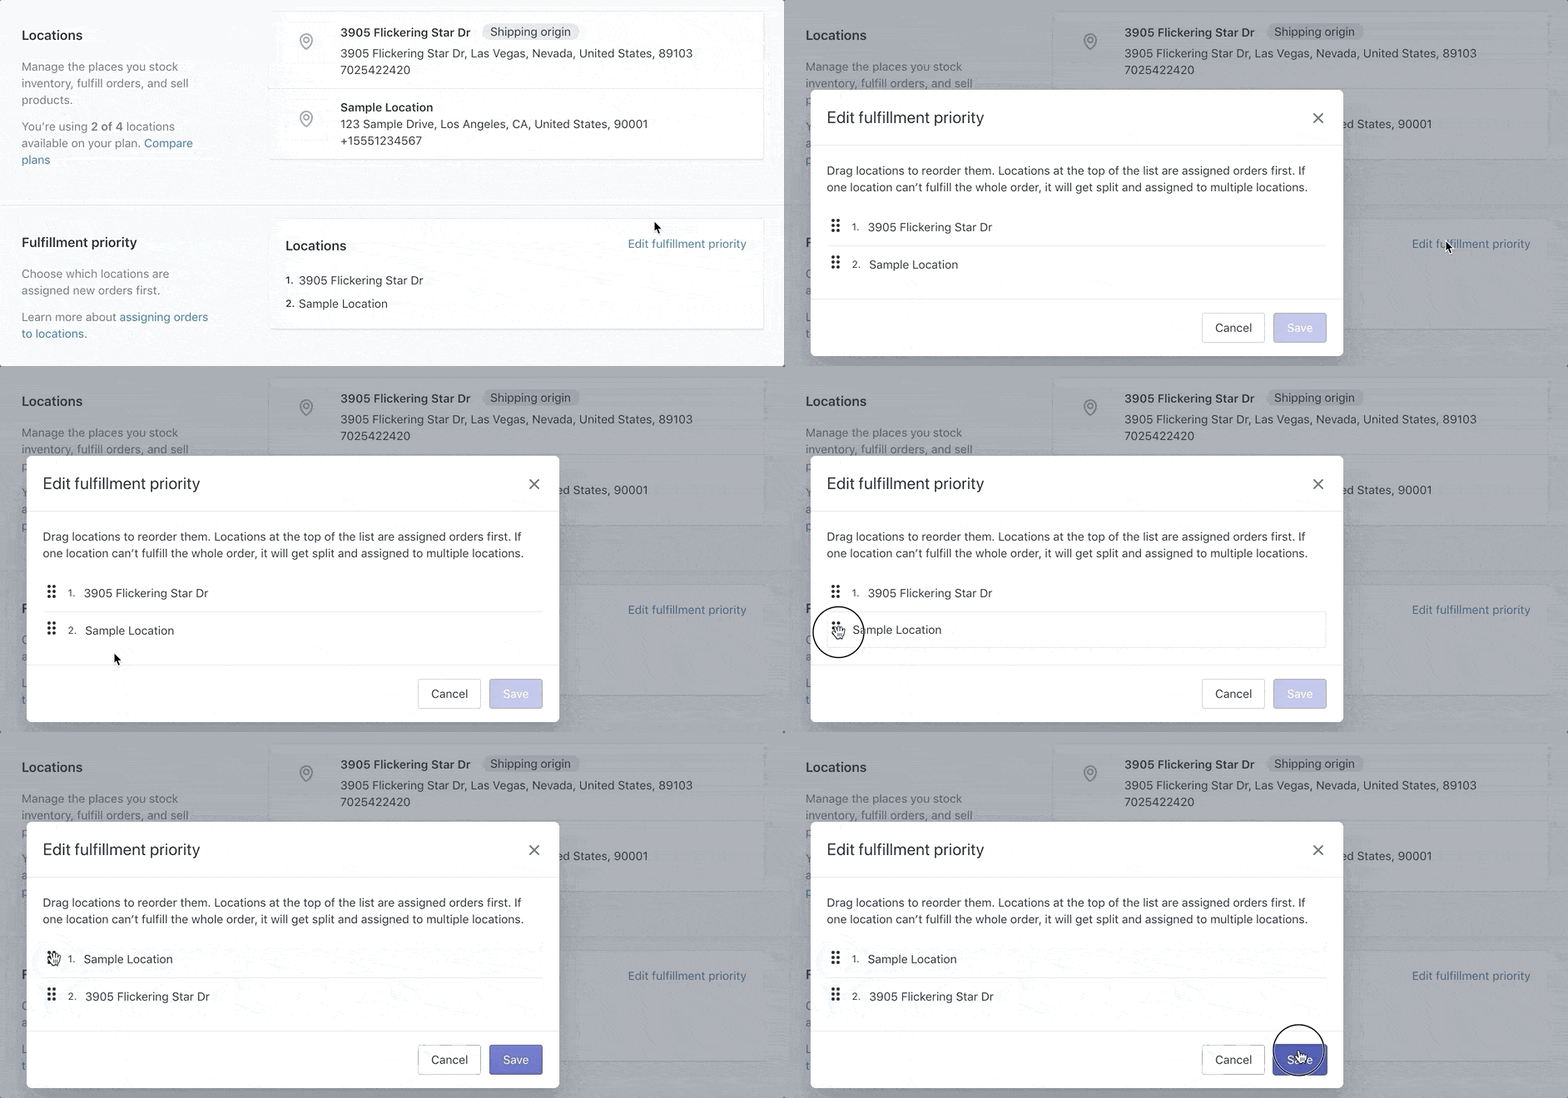


Step #4: Save your changes.
How to Change the Shipping Origin
Note: You do not need to change your shipping origin if you are using a fulfillment service or dropshipping app.
Step #1: Navigate to “Locations” from your “Settings” menu.
Step #2: Click “Change shipping origin” from the “Shipping from” section of the page.
Step #3: Choose a location.
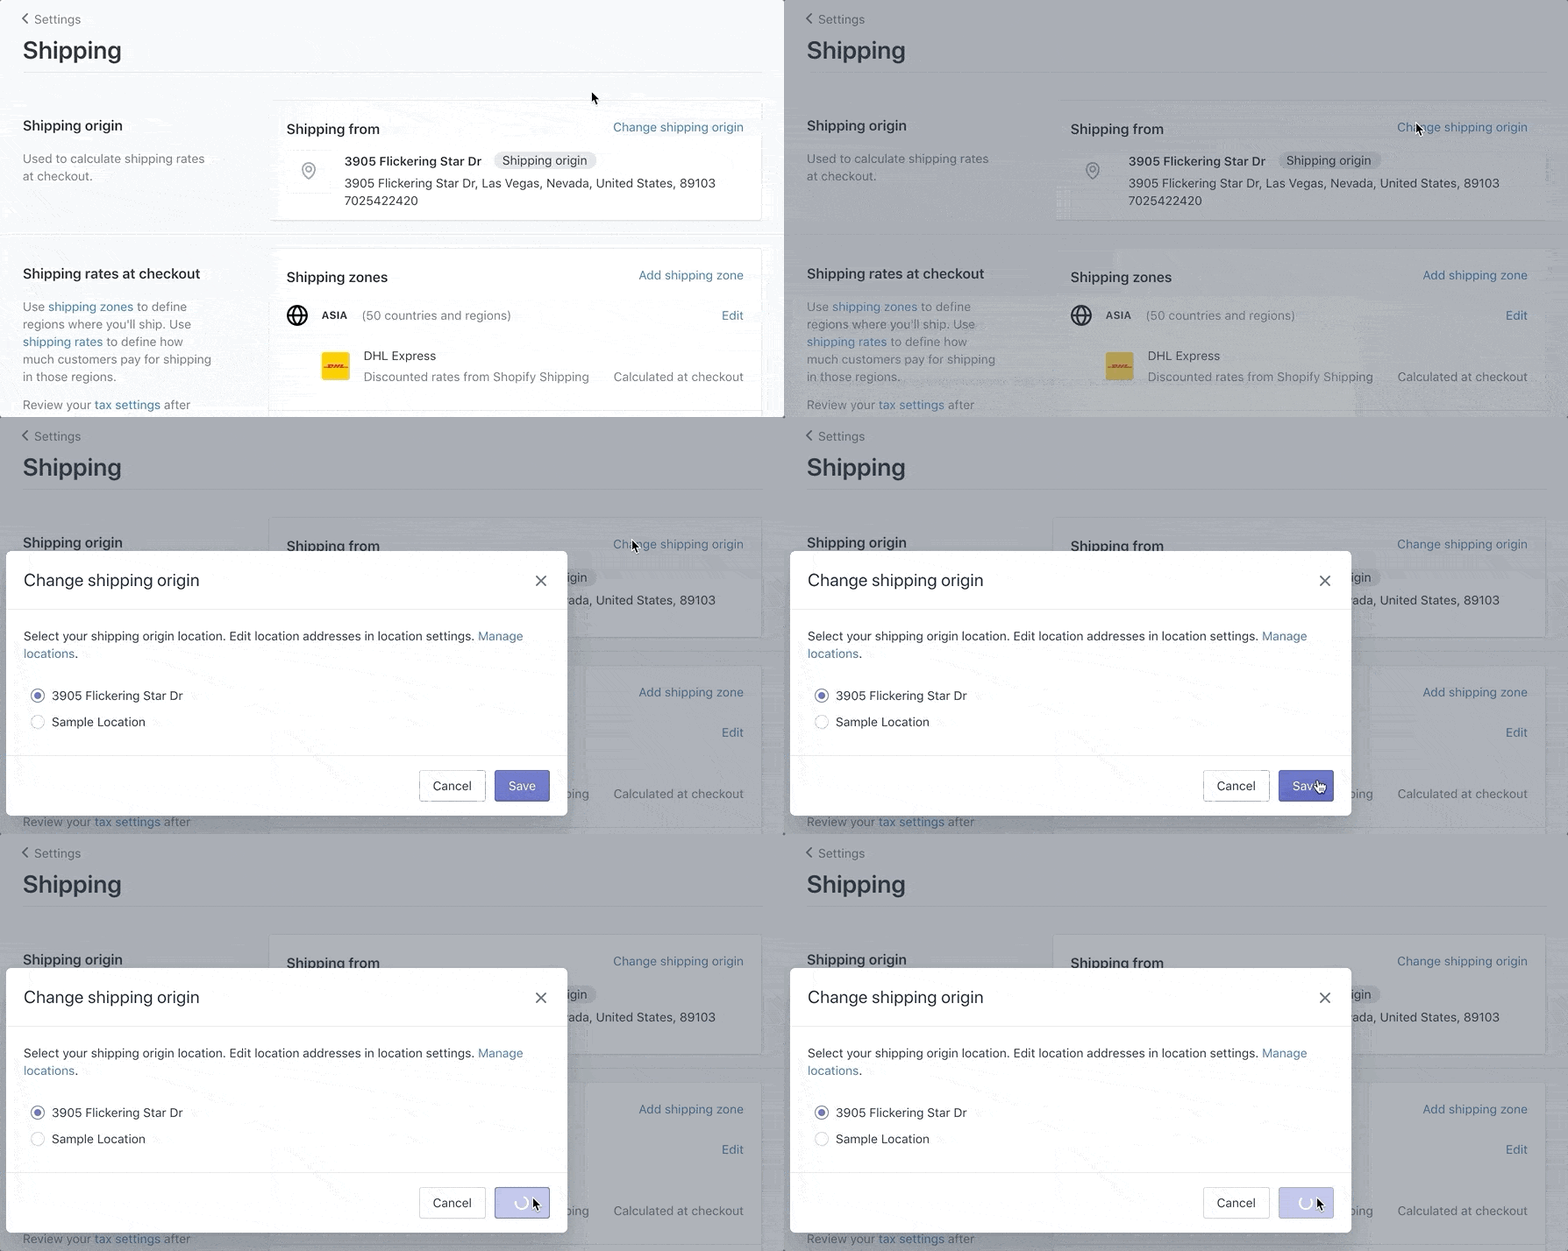


Step #4: Save your changes.
How to Delete a Location
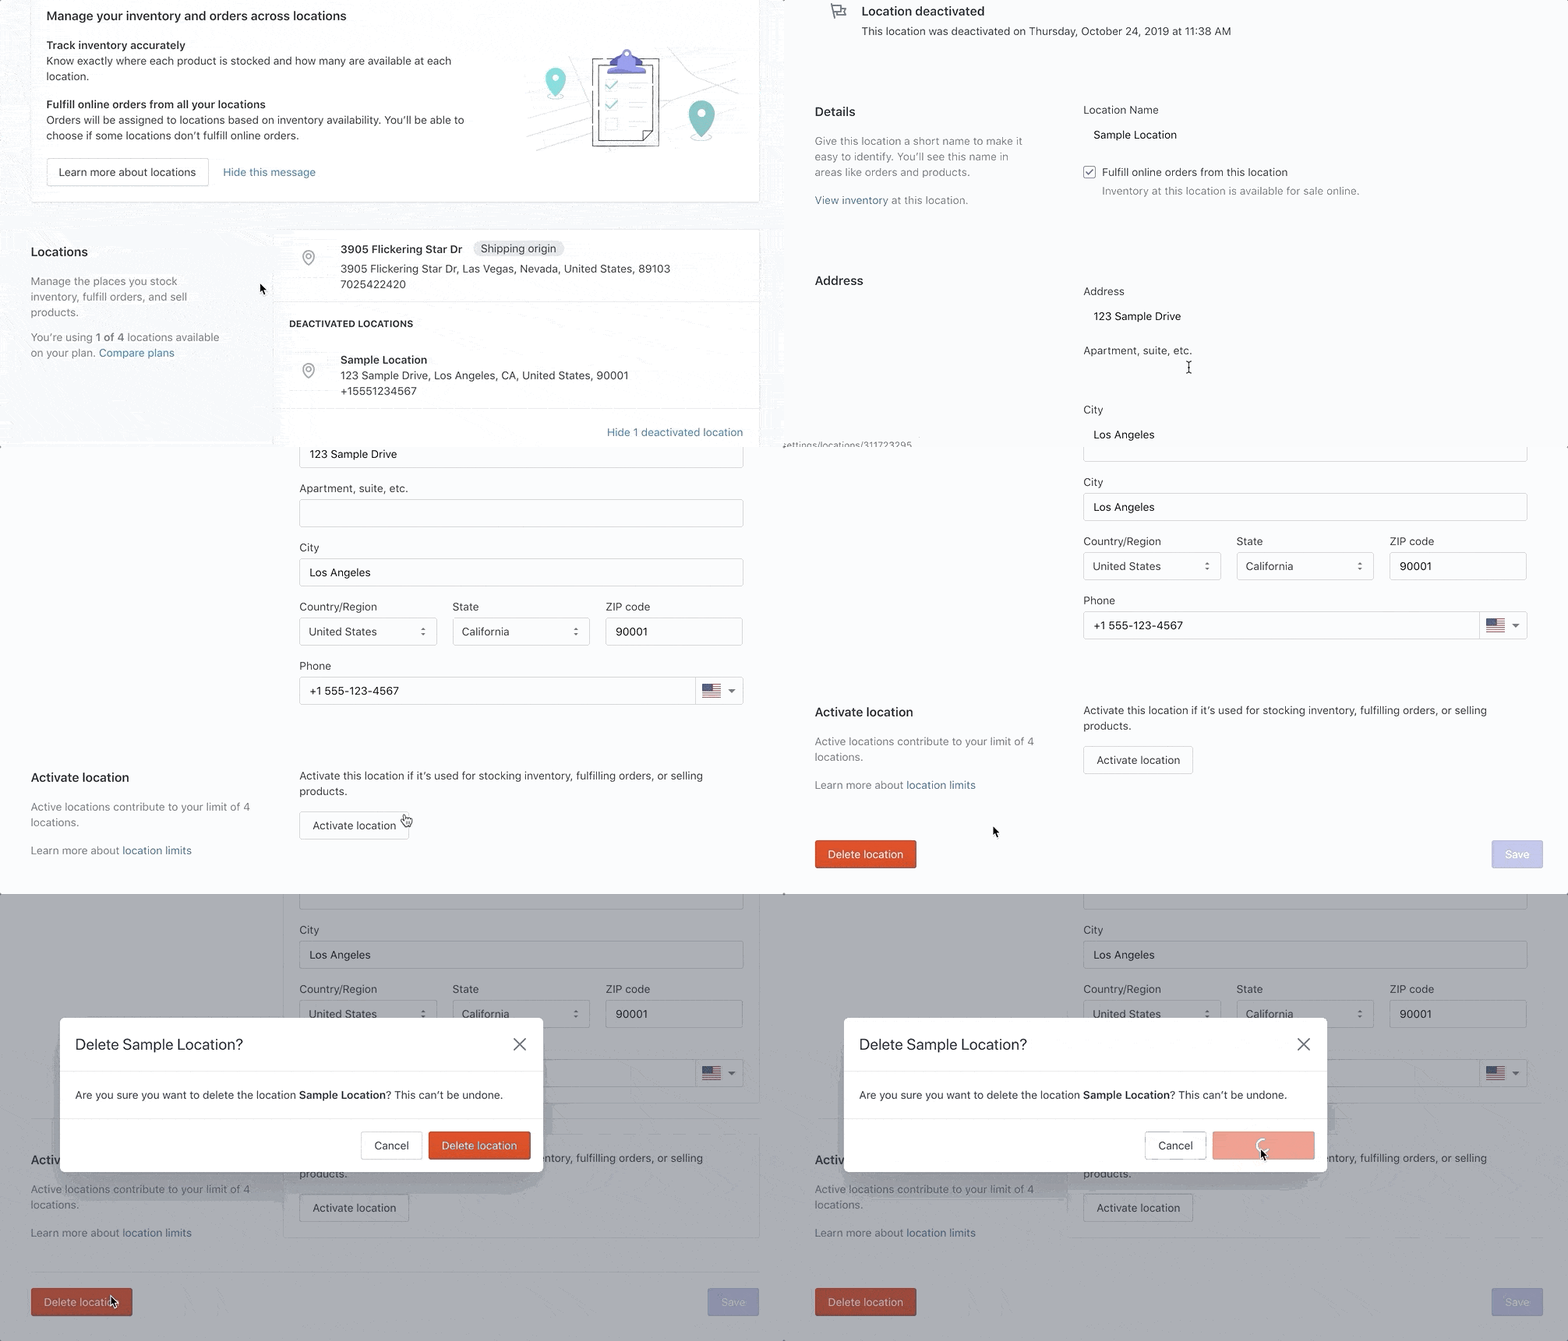
Before a location can be deleted, it must first be deactivated. You cannot deactivate a location that is set as your shipping origin. All of the historical data of a deleted location will still be saved for your reporting uses.
Step #1: Go to “Locations” from your “Settings” menu.
Step #2: Select a location that has already been deactivated.
Step #3: Click “Delete location.”


Comments