

You can easily export your inventory as a CSV file containing the product quantities at your location. Alternatively, you can import a CSV file to Shopify containing your inventory quantities.
In this tutorial, I’ll show you how to do both.
Exporting Shopify Inventory
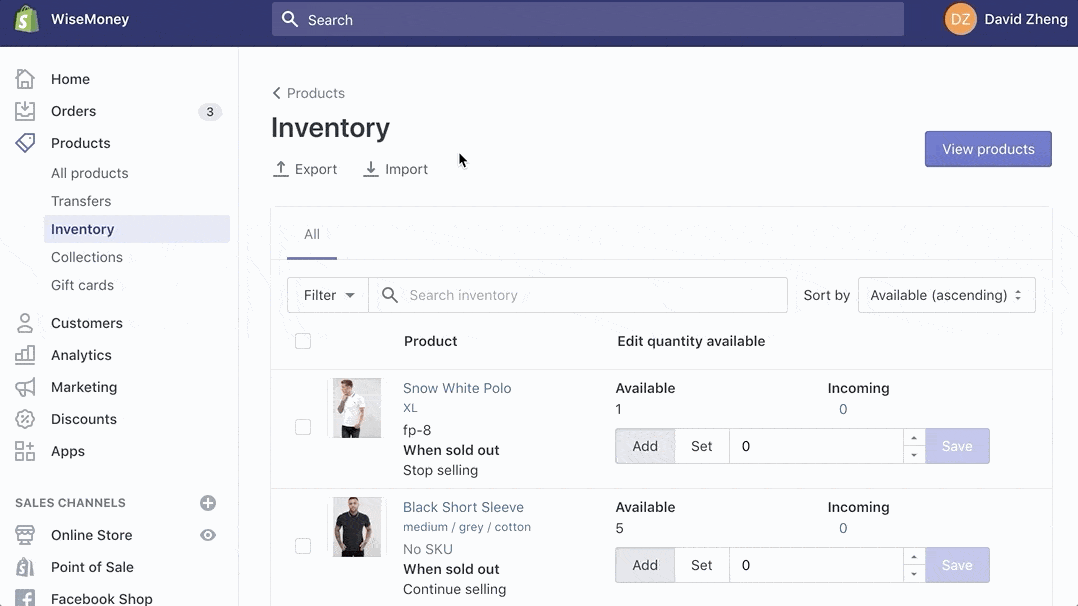
Step #1: Go to the “Products” menu.
Step #2: Select “Inventory.”
Step #3: Click “Export.”
Step #4: Choose your export preferences.
Step #5: Click “Export Variants.”

Importing Shopify Inventory
Importing a CSV file with your inventory is just as easy. Follow the first two steps that we took above until you land on the “Inventory” page. Then simply:
Step #1: Click “Import”
Step #2: Add the CSV file.
Step #3: Upload the file.

Any variants that you import will override the inventory at your selected location. So make sure that the CSV file you’re uploading is accurate before you go through these steps.
Inventory CSV File Format
Your inventory CSV file holds crucial data that will identify all of your products, varients, and inventory quantities at each location. Use the following columns in your CSV file before you import to Shopify:
- Handle — Identifying name used in the URL for your product.
- Title — This is optional. If you add a title, then leave the value columns blank.
- Option1 Name — “Color” is an example of an option.
- Option1 Value — “Blue” would be an example of a value for a product with a “Color” option.
- Quantity — How much inventory is at the location.
You can also add columns for Option2 Name, Option2 Value, Option3 Name, Option3 Value, etc. Make sure that different varients options that are easy to spot. Otherwise, it will be confusing when your inventory gets imported.
All inventory CSV files need to be formatted this way and must be saved with a .csv file extension.
Comments