When you add the Amazon sales channel to your Shopify account, your products don’t automatically get listed on Amazon.
Instead, you’ll need to create a listing and submit it to Amazon for approval. For the most part, these products are approved in a few hours at most. Once approved, the product will appear on Amazon, and orders can be managed directly from the Shopify dashboard.
The first thing you need to do is create a listing for your products by selecting one of the following Amazon categories:
- Clothing, Shoes, and Jewelry
- Arts and Crafts
- Home and Kitchen
- Patio, Lawn, and Garden
- Outdoors and Sports
- Health and Household
- Games and Toys
- Beauty
- Electronics
To add a product to Amazon, follow these simple steps:
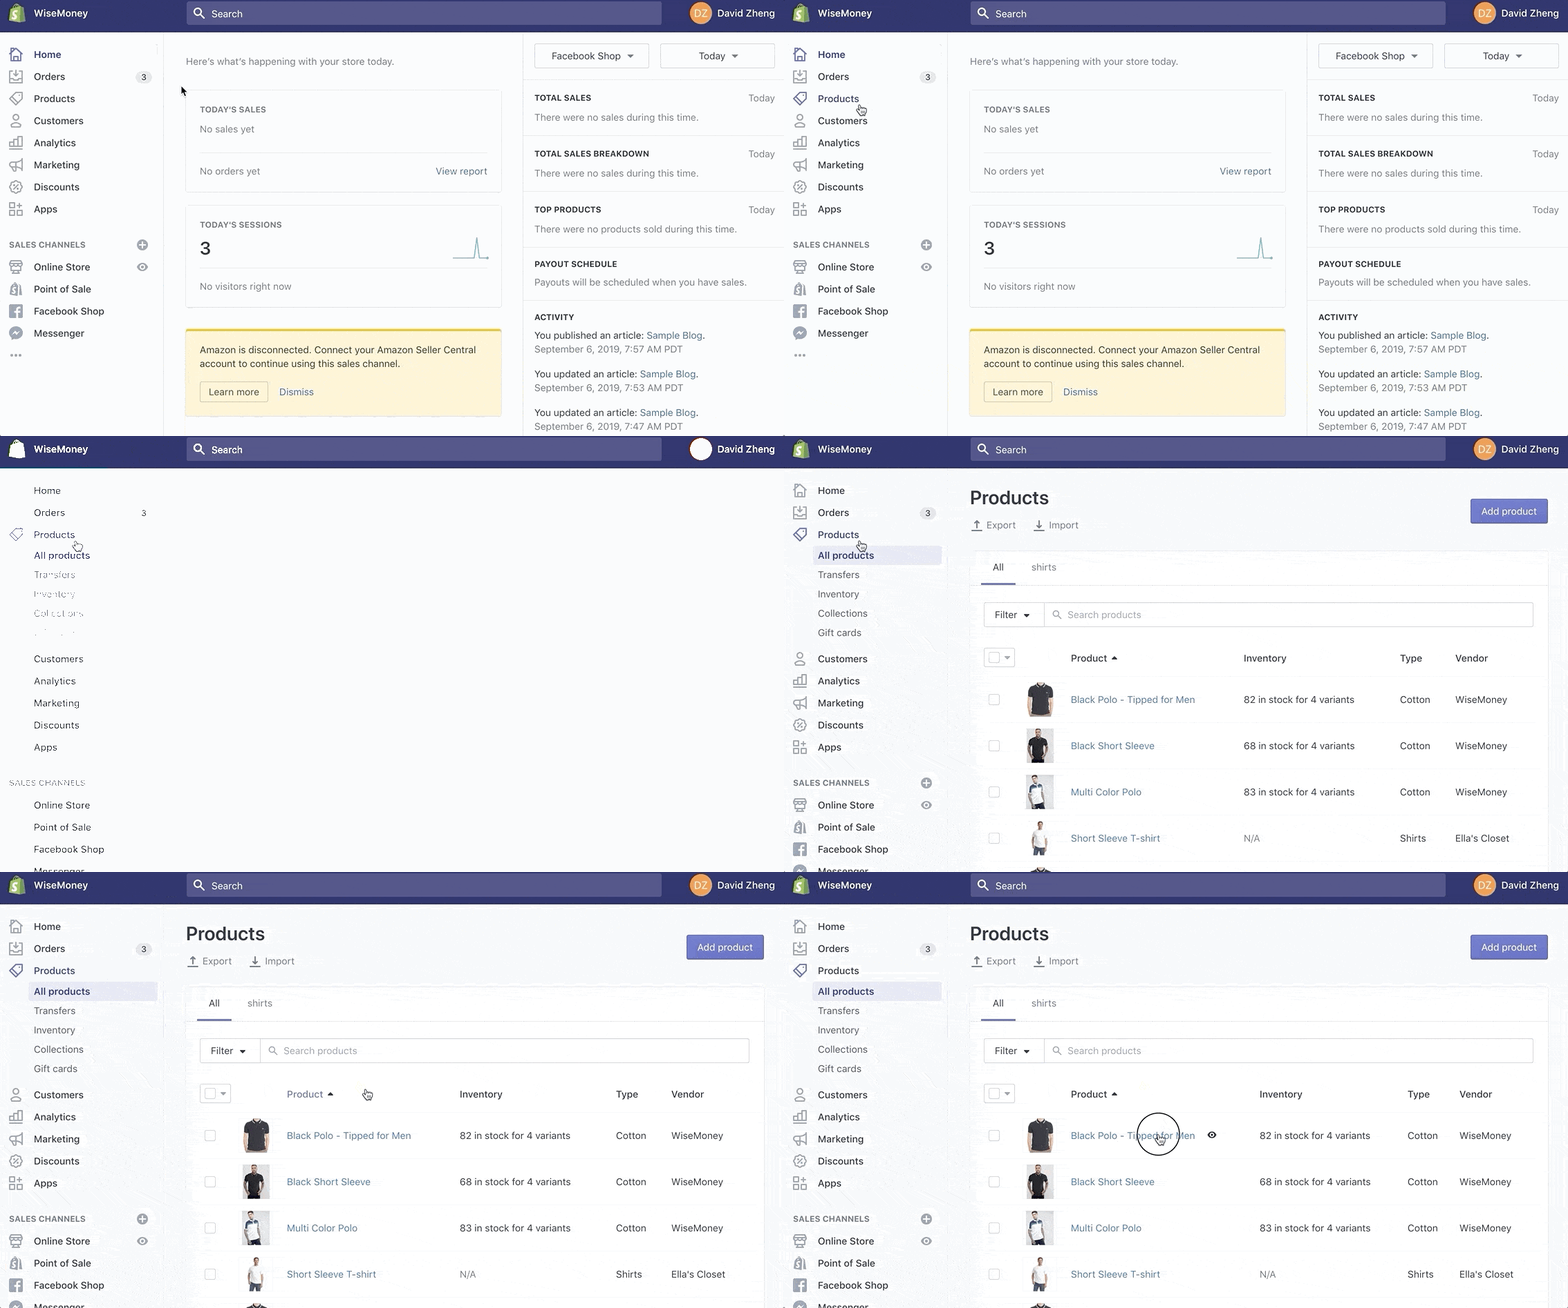
Step #1: Navigate to the “Products” page from your Shopify admin dashboard.
Step #2: Select the product you want to add to Amazon.


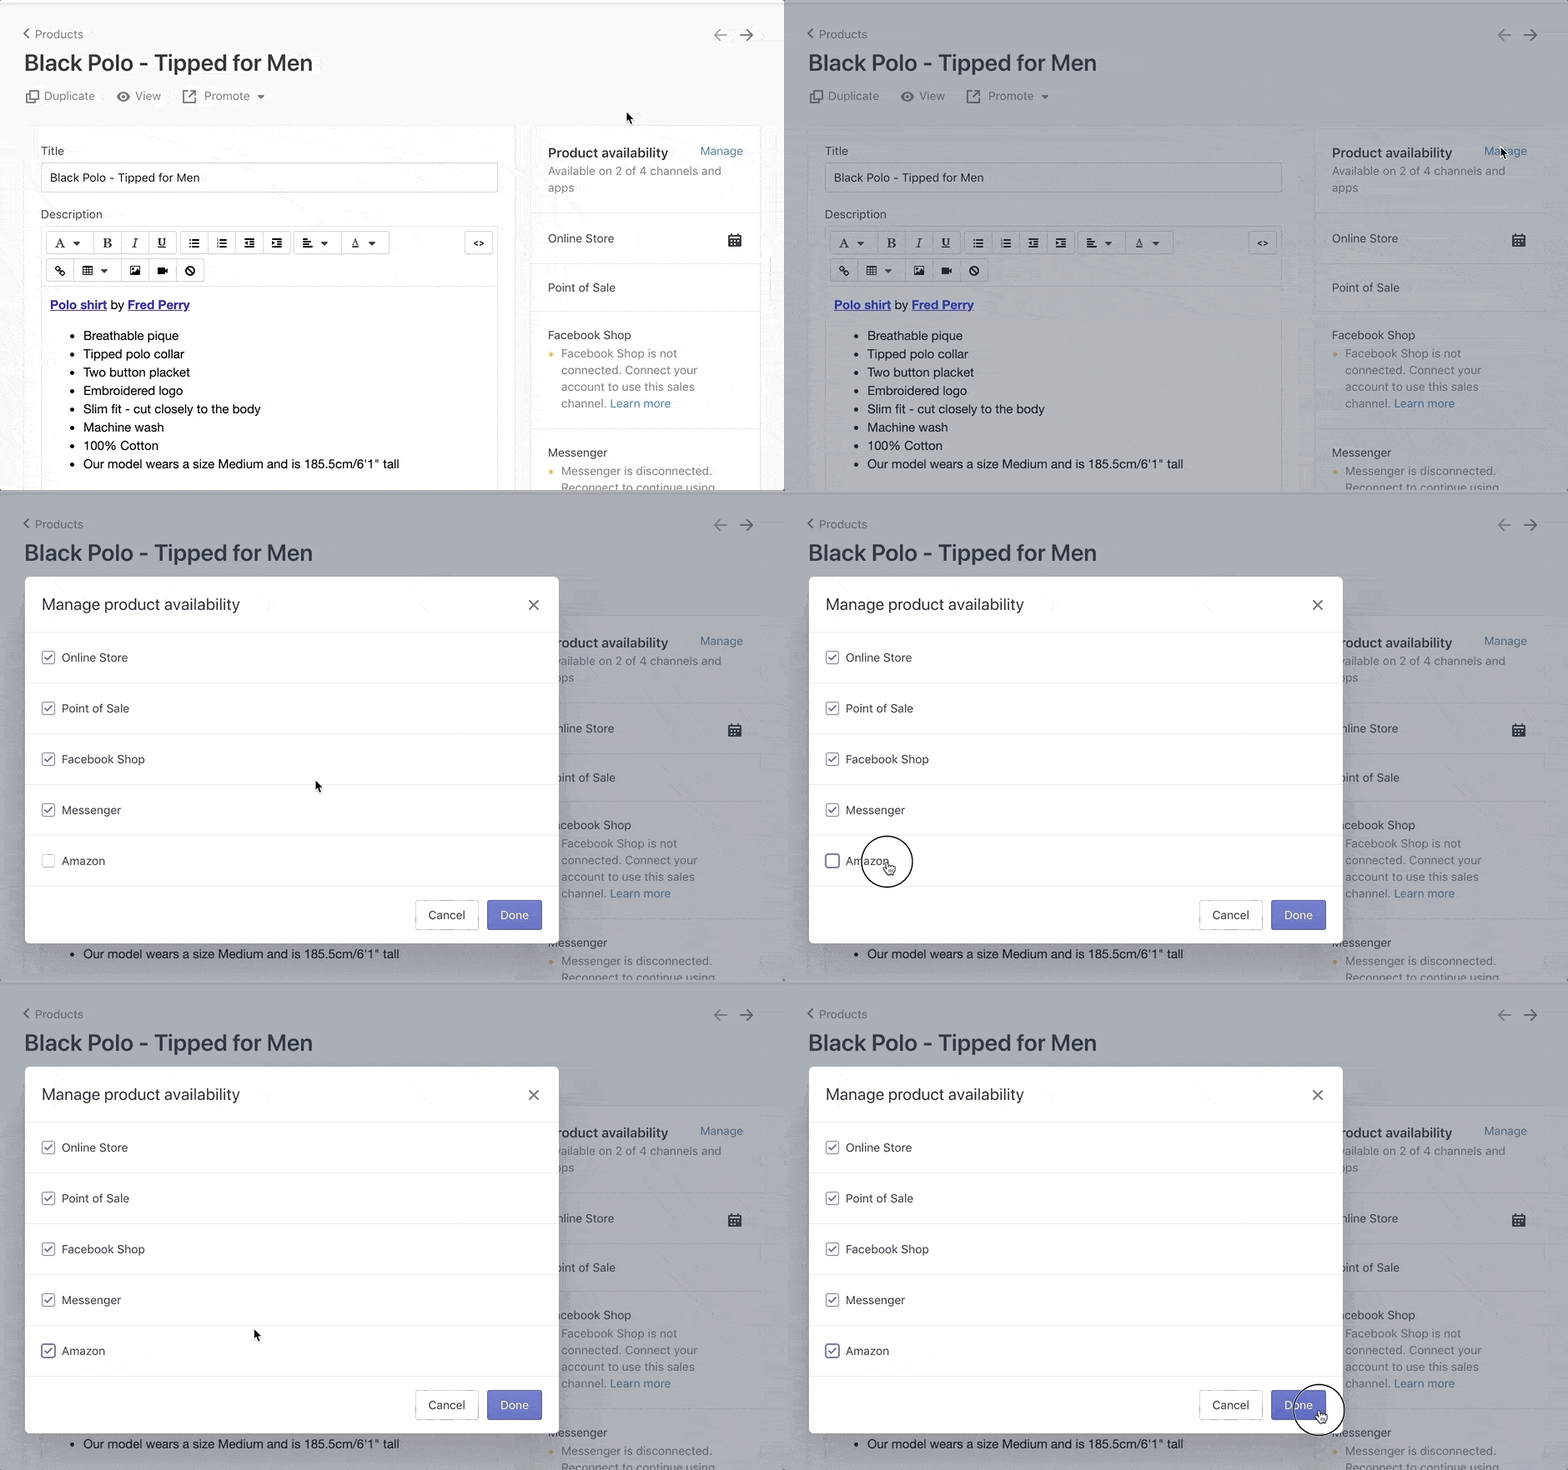
Step #3: Click “Manage” in the “Product Availability” section of this page.
Step #4: Make sure that “Amazon” is selected.


For those of you who are already using Shopify to manage your inventory, then the inventory for your products will automatically be updated on Amazon as well.
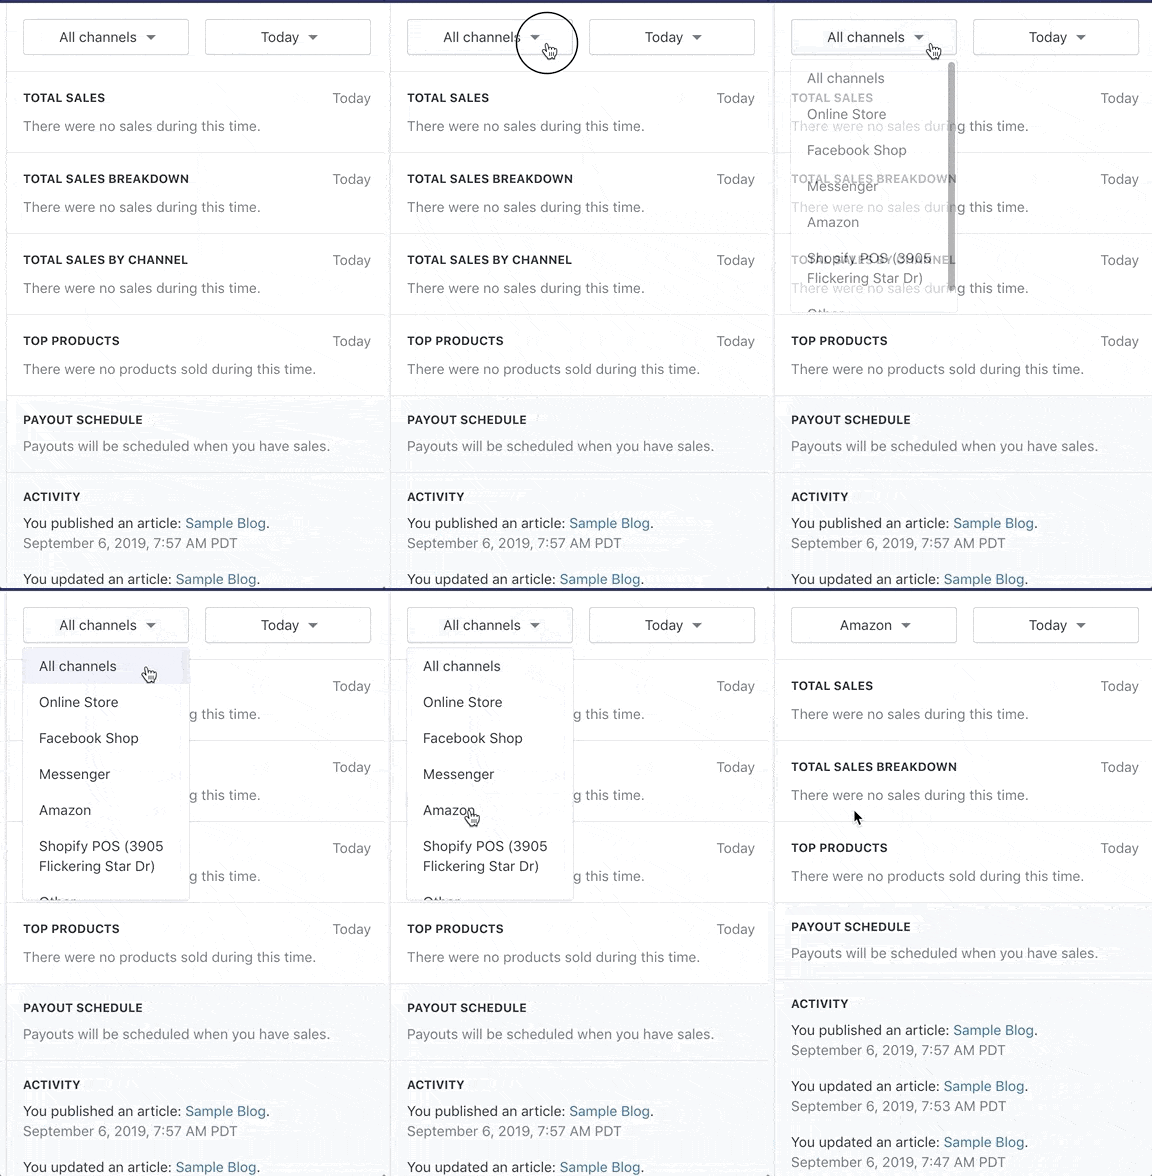
To manage orders coming in from Amazon, simply filter those on your homepage.


From here, you’ll be able to view, manage, and fill all orders coming from your Amazon sales channel.
Note: It can take up to 30 minutes for Amazon orders to sync with your Shopify account.

Comments